
Are you tired of driving around with a dim or burnt-out headlight? We’ve got you covered with our DIY headlight replacement tips. Changing a headlight may seem like a daunting task, but with a little guidance, you can do it yourself and save some money in the process. In this article, we’ll walk you through the step-by-step process of how to change a headlight, so you can get back on the road with a bright and clear view ahead.
When it comes to headlight replacement, many people immediately think of visiting a mechanic. But why spend extra money when you can easily do it yourself? With our expert tips and tricks, you’ll be able to tackle this task like a pro. Whether you’re a seasoned DIYer or a beginner, our comprehensive guide will provide you with all the information you need to successfully change your headlight. So, grab your tools and let’s get started on transforming your dim headlights into powerful beams that will light up the night.
Gather the necessary tools and materials
When it comes to changing a headlight, it’s important to have the right tools and materials on hand. Here’s what you’ll need to gather before getting started:
- New headlight bulb: Make sure you purchase the correct replacement bulb for your specific car model. Check your car’s manual or consult with the manufacturer to find the right bulb type.
- Screwdriver: Many headlight assemblies require removing screws to access the bulb. Having a screwdriver with the appropriate size and type will make this task easier.
- Protective gloves: It’s always a good idea to wear gloves when working with car parts. This helps protect your hands from any sharp edges or debris that may be present.
- Clean cloth or towel: Before installing the new headlight bulb, it’s important to clean the surface of the assembly to ensure proper visibility. A clean cloth or towel will come in handy for this step.
- Optional: flashlight: Depending on the location of your headlight assembly, a flashlight may be helpful in providing extra visibility.
- Safety glasses: While not essential, wearing safety glasses while working on your headlights can protect your eyes from any potential debris or fragments.
- Step ladder or stool: If your headlights are located higher up on the vehicle, having a step ladder or stool nearby can help you reach them more easily and safely.
Having these tools and materials ready will ensure a smooth and hassle-free headlight replacement process. Once you’ve gathered everything, you’re ready to move on to the next steps, which we’ll cover in the following section.
Determine the type of headlight bulb
When it comes to replacing a headlight bulb, the first step is to determine the type of bulb your vehicle requires. There are several different types of headlight bulbs available in the market, and it’s essential to use the correct one for your vehicle to ensure proper functionality.
Here are a few easy steps to help you determine the type of headlight bulb your car needs:
- Refer to your vehicle’s owner’s manual: Your car’s manual is a valuable resource that contains detailed information about your vehicle, including the type of headlight bulbs it uses. Check the manual for the specific bulb type and wattage recommended for your car’s headlights.
- Inspect the existing bulb: If you’re unable to find the information in your owner’s manual, you can inspect the existing bulb. Carefully remove the headlight assembly cover or access panel to reach the bulb. Take note of the bulb’s shape, size, and any visible markings or numbers.
- Consult an online bulb finder tool: If you’re still unsure about the bulb type, you can use an online bulb finder tool. These tools allow you to enter your vehicle’s make, model, and year to get a list of compatible bulb options. Simply enter your vehicle’s details, and the tool will provide you with the correct bulb type for your headlights.
It’s crucial to note that headlight bulbs are available in various types, such as halogen, HID (High-Intensity Discharge), LED (Light-Emitting Diode), and more. Each type has its own advantages and considerations, so it’s essential to choose the right one for your vehicle.
Determining the correct headlight bulb type is the first step towards successfully replacing your headlight. Once you have identified the bulb type, you can proceed with the next steps to ensure a smooth and hassle-free DIY headlight replacement process.
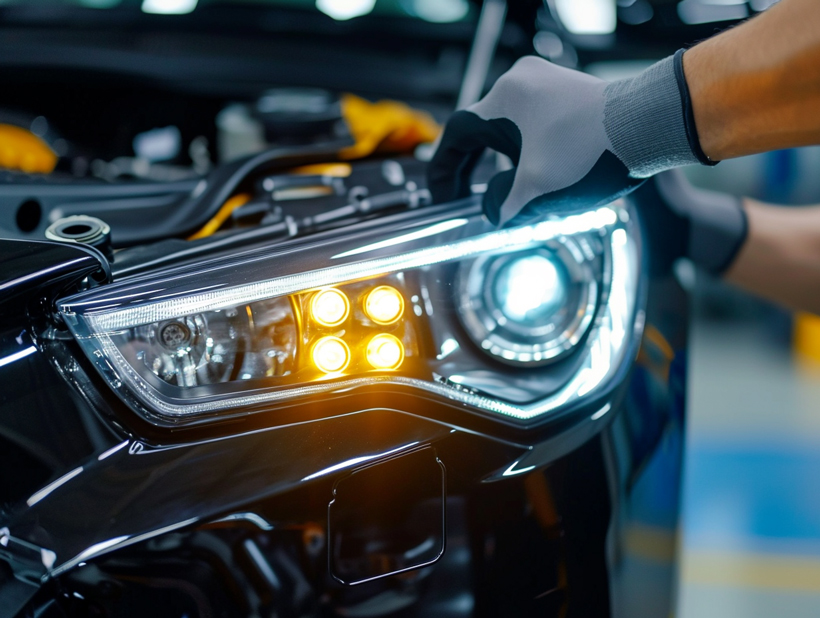
Locate the headlight assembly

When it comes to changing a headlight, the first step is to locate the headlight assembly. This is where the bulb is housed. The exact location of the headlight assembly may vary depending on the make and model of your vehicle, but here are some general steps to help you find it:
- Consult the Owner’s Manual: The owner’s manual is a valuable resource that provides information specific to your vehicle. It usually includes a section on replacing headlight bulbs and will guide you to the location of the headlight assembly.
- Inspect the Front of the Vehicle: In many cases, the headlight assembly can be found towards the front of the vehicle. Look for the area where the headlights are positioned and examine the surface for any visible screws, clips, or covers that may indicate the location of the assembly.
- Refer to Online Resources: If you’re unable to locate the headlight assembly through the owner’s manual or a visual inspection, you can turn to online resources. Many websites and forums provide detailed information on how to locate the headlight assembly for various vehicle makes and models.
- Consider Seeking Professional Help: If you’re running into difficulties or just prefer to have an expert handle the replacement, it’s always a good idea to consult a professional mechanic. They have the knowledge and experience to quickly locate and replace the headlight bulb, ensuring a job well done.
Remember, the location of the headlight assembly can vary, so it’s important to rely on the specific instructions provided by your vehicle’s manufacturer. Additionally, always ensure that you have the correct replacement bulb before attempting the replacement process.
By following these steps, you’ll be well on your way to successfully changing a headlight. Next, we’ll move on to the next step in the DIY headlight replacement process: removing the headlight bulb.
Remove the headlight cover or assembly
To begin the DIY headlight replacement process, we need to remove the headlight cover or assembly. This step allows us to access the headlight bulb and replace it with a new one. Follow these steps to complete this important task:
- Locate the headlight cover: Depending on the vehicle make and model, the headlight cover may be a separate component or part of the headlight assembly. We can refer to the vehicle’s owner’s manual for specific instructions on how to locate and remove the headlight cover.
- Remove the screws or clips: In most cases, we will need to remove screws or clips that hold the headlight cover in place. These screws or clips are typically located on the top or sides of the cover. We should use the appropriate screwdriver or pliers to remove them carefully.
- Detach the headlight cover: After removing the screws or clips, we can gently detach the headlight cover from the headlight assembly. We may need to apply some pressure or wiggle it gently to loosen it. It’s essential to be cautious and not apply excessive force to avoid damaging the cover or assembly.
- Disconnect the wiring harness: Once we have removed the headlight cover, we will likely find a wiring harness connected to the headlight bulb. We need to disconnect this harness by carefully pressing the release tab or twisting it counterclockwise, depending on the connector type. This step allows us to gain access to the headlight bulb.
- Remove the headlight bulb: With the wiring harness disconnected, we can now remove the old headlight bulb. We may need to twist it counterclockwise or pull it straight out, depending on the bulb type. It’s important to avoid touching the bulb’s glass surface, as oil from our fingers can reduce its lifespan.
Now that we have successfully removed the headlight cover or assembly, we can proceed to the next step of our DIY headlight replacement process.
| Step | Description |
|---|---|
| 1 | Locate the headlight cover – refer to the owner’s manual for specific instructions. |
| 2 | Remove the screws or clips – use the appropriate tools to carefully remove them. |
Replace the headlight bulb
When it comes to changing a headlight bulb, it’s important to make sure you have the right type of bulb for your vehicle. The replacement process will vary depending on whether you have a halogen, HID, or LED bulb. Here are the steps to follow for a successful headlight bulb replacement:
- Gather the necessary tools: Before you begin, gather the tools you’ll need, such as a screwdriver or pliers. Having the right tools on hand will make the replacement process easier and more efficient.
- Locate the headlight assembly: Consult your vehicle’s owner’s manual to find the location of the headlight assembly. It may be helpful to inspect the front of your vehicle to get a visual idea of where the assembly is situated. Additionally, you can seek online resources or professional help to pinpoint the exact location.
- Remove the headlight cover or assembly: Depending on your vehicle model, you may need to remove the headlight cover or the entire assembly. Follow the specific instructions provided by the vehicle’s manufacturer to ensure a proper removal process. This may involve removing screws or clips, detaching the cover, and disconnecting the wiring harness.
- Access the bulb: Once the headlight assembly is removed, you’ll have access to the bulb. Carefully remove the old bulb by twisting it counterclockwise and pulling it out from the socket. Be cautious not to touch the glass part of the new bulb, as the oils from your skin can potentially damage it.
- Install the new bulb: Take the new bulb, align the tabs on the base with the notches in the socket, and insert it into the socket. Give it a clockwise twist to secure it properly. Make sure the bulb is seated firmly and securely in the socket.
- Reattach the headlight cover or assembly: Follow the manufacturer’s instructions to reattach the headlight cover or assembly. This may involve reconnecting the wiring harness, aligning the cover correctly, and securing it back into place with screws or clips.
- Test the headlights: Once you’ve completed the replacement process, turn on your headlights to ensure they are working properly. If the new bulb is functioning correctly, you should see a clear and bright light.
Test the new headlight bulb
Once you have successfully installed the new headlight bulb, it’s important to test it to ensure that everything is in working order. Here are the steps to follow to test the new headlight bulb:
- Turn on the Headlights: Start by turning on the headlights. This will allow you to check if the new bulb is functioning properly. Make sure to park your vehicle in a safe and well-lit area before proceeding.
- Check Both High and Low Beams: Test both the high and low beams of the headlights. This will help you determine if the bulb is providing adequate brightness for both settings.
- Inspect for Proper Alignment: While the headlights are on, take a moment to visually inspect the alignment of the new bulb. It should match the alignment of the other working headlight. If you notice any inconsistencies, it may indicate a problem with the installation.
- Look for Any Flickering or Dimming: Keep a close eye on the new headlight bulb while it is on. Check for any flickering or dimming of the light. This could be a sign of a loose connection or a faulty bulb. If you notice any issues, it’s essential to address them promptly.
- Test Both Headlights Simultaneously: Finally, it’s important to test both headlights simultaneously. This will help ensure that both bulbs are working in harmony and providing adequate lighting for the road ahead.
Remember, proper headlight functionality is crucial for your safety on the road. If you encounter any issues during the testing process, it may be necessary to double-check the installation or seek professional assistance.
Following these steps will help you determine if the new headlight bulb replacement was successful. By testing the bulb thoroughly, you can drive with confidence knowing that your headlights are working properly.
Reinstall the headlight cover or assembly

After successfully replacing the headlight bulb, the next step is to reinstall the headlight cover or assembly. This is an important step to ensure that the new bulb is protected and properly positioned within the headlight assembly. Follow these steps to complete the process:
- Align the tabs: Align the tabs on the headlight cover or assembly with the corresponding slots on the vehicle’s frame. This ensures a secure fit and prevents any moisture or dirt from entering the headlight assembly.
- Gently secure the cover or assembly: Once the tabs are aligned, apply gentle pressure to secure the headlight cover or assembly in place. Be sure to avoid using excessive force, as this could damage the cover or assembly.
- Double-check the alignment: Take a moment to double-check the alignment of the headlight cover or assembly. Make sure that it sits flush against the vehicle’s frame and is properly aligned with the other features of the vehicle’s front end.
- Test for secure fit: Give the headlight cover or assembly a slight shake to ensure that it is securely fastened. If you notice any movement or looseness, gently readjust the cover or assembly until it is firmly in place.
Once you have successfully reinstalled the headlight cover or assembly, it’s time to test the headlights to ensure that they are working properly. This is a crucial step to ensure your safety while driving at night or in low visibility conditions.
Remember, proper headlight functionality is essential for a safe driving experience. If you encounter any issues during the testing process, it is recommended to seek professional assistance to address the problem.
Now that you have completed the process of changing a headlight bulb and reinstalling the headlight cover or assembly, you can rest assured knowing that you have taken a necessary step towards maintaining the safety and functionality of your vehicle’s headlights.
Adjust the headlight aim

One important step in replacing a headlight is to properly adjust the headlight aim. This ensures that the headlights provide optimal visibility while driving at night. Here are some tips on how to adjust the headlight aim:
1. Park on a level surface: Find a level surface to park your car and make sure it is facing a flat wall or garage door. This will provide a reference point to adjust the headlight aim accurately.
2. Check the owner’s manual: Consult the owner’s manual of your vehicle to locate the headlight adjustment screws. These screws are typically found near the headlight assembly and can be adjusted with a screwdriver or a specialized tool.
3. Measure the distance: To achieve accurate headlight aiming, measure the distance between the ground and the center of each headlight. Mark this distance on the wall or garage door using tape or chalk. This will serve as a point of reference for adjusting the headlight aim.
4. Adjust the vertical aim: Start by adjusting the vertical aim of the headlights. Use the headlight adjustment screws to raise or lower the beam until it aligns with the marked reference point on the wall or garage door. Ensure that both headlights are adjusted to the same height for balanced visibility.
5. Adjust the horizontal aim: Once the vertical aim is set, adjust the horizontal aim of the headlights. Again, use the headlight adjustment screws to move the beam left or right until it aligns with the marked reference point on the wall or garage door. This will ensure that the headlights provide a clear and wide illumination of the road ahead.
6. Test the headlight aim: After adjusting the headlight aim, it’s important to test the headlights to ensure they are properly aligned. Take a short drive at night and observe the lighting pattern. The headlights should illuminate the road ahead without glaring or blinding oncoming traffic.
7. Seek professional assistance if needed: If you encounter difficulties adjusting the headlight aim or if you’re unsure about the process, it’s always best to seek professional assistance. A qualified mechanic or a car dealership can help you properly adjust the headlight aim for optimal visibility and safety.
Conclusion
Changing a headlight bulb may seem like a daunting task, but with the right knowledge and tools, it can be a straightforward DIY project. By following the steps outlined in this article, you can confidently replace your headlight bulb and ensure optimal visibility while driving at night.
Remember, it is crucial to use the correct bulb type for your vehicle to ensure proper functionality. Take the time to gather the necessary tools and locate the headlight assembly before starting the replacement process. Be careful not to touch the glass part of the new bulb with bare hands, as this can cause damage.
Once you have successfully replaced the headlight bulb, make sure to reinstall the headlight cover or assembly properly. Proper alignment and a secure fit are essential to protect the new bulb and ensure its longevity.
Finally, don’t forget to adjust the headlight aim for optimal visibility. Follow the tips provided in this article to adjust the aim correctly and test it by taking a short drive at night.
With these DIY headlight replacement tips, you can confidently maintain your vehicle’s headlights and ensure a safe driving experience.