
When we’re cruising down the road and our check engine light starts to flicker, it’s enough to make anyone’s heart skip a beat. But when it blinks and then stays on, it’s a clear sign our car’s trying to tell us something important. We’re here to decode that message.
Understanding OBD-II codes can seem like deciphering an ancient language, but it’s actually our vehicle’s way of communicating its health status. Let’s dive into what these signals mean and how we can address them effectively.
What is the Check Engine Light?
When we start our vehicle, various dashboard lights briefly illuminate as part of a self-test to verify systems are operational. However, if the check engine light blinks then remains lit, it indicates a problem that we shouldn’t ignore. Typically, this light is a warning signal tied to our car‚Äôs onboard diagnostics system, or OBD-II. This system monitors engine performance and emissions control systems.
There are several key reasons why the check engine light comes on:
- Sensor Malfunctions: Critical sensors such as the oxygen sensor or mass airflow sensor could be faulty.
- Emission Control Issues: Problems with the emission control system are possible, such as a loose gas cap or failing catalytic converter.
- Engine Performance Complications: Issues like misfires can trip the check engine light.
- Cylinder problems requiring immediate attention might also cause the light to stay on after blinking.
To understand the severity, we pay attention to how the light behaves:
- Steady Illumination: suggests a less urgent issue, but one that still needs checking.
- Blinking: signals a more serious problem that could lead to damage if not addressed promptly.
The OBD-II system records diagnostic trouble codes (DTCs) which provide insight into the malfunctions our car is experiencing. To retrieve these codes, one would use an OBD-II scanner. These codes generally start with a letter followed by a four-digit number, with each digit providing specific information about the fault.
Let’s break down the components of a DTC:
- First Letter: Indicates the system related to the fault (e.g., P for Powertrain, B for Body).
- First Digit: Signifies whether the code is generic (0) or manufacturer-specific (1).
- Second Digit: Identifies the subsystem (e.g., fuel, air, or emissions systems).
- Last Two Digits: Point to the specific fault within the subsystem.
By understanding these codes and the check engine light’s behavior, we can take informed steps to address vehicle issues effectively, maintaining both safety and vehicle performance.
Why is the Check Engine Light Blinking?
When we’re driving and the check engine light starts blinking, it signals an issue that we shouldn’t ignore. This alarming behavior typically indicates a severe engine misfire, allowing unburned fuel to dump into the exhaust system. There, it can raise temperatures to a point that may damage critical components, like the catalytic converter. Let’s explore some primary causes for this kind of behavior:
- Ignition System Faults: Issues with spark plugs, ignition wires, or coil packs can lead to uneven engine firing.
- Fuel System Problems: A clogged fuel injector or a failing fuel pump can prevent the correct amount of fuel from reaching the engine.
- Emission Control Issues: Components like the oxygen sensors or EGR valve could malfunction, leading to improper exhaust emissions.
- Vacuum Leaks: These allow extra air to enter the engine, disrupting the air-to-fuel ratio.
Diagnosing the exact cause of the blinking light can be complex, and it’s often best left to professionals. However, noting the frequency and behavior of the light can help pinpoint the severity of the issue. A steady light might indicate a minor problem, while a blinking one calls for immediate attention.
It’s also worth mentioning that sometimes a temporary glitch, such as driving through a deep puddle, can cause the check engine light to blink. However, if it stops blinking and stays on after the incident, it’s still crucial to run a diagnostic check. By plugging in an OBD-II scanner, we can retrieve the specific diagnostic trouble codes that can shed light on the heart of the problem.
The following table provides a glimpse at the common codes that relate to a blinking check engine light:
| Code | Description |
|---|---|
| P0300 | Random/Multiple Cylinder Misfire Detected |
| P0301 | Cylinder 1 Misfire Detected |
| P0302 | Cylinder 2 Misfire Detected |
| P0420 | Catalyst System Efficiency Below Threshold |
| P0440 | Evaporative Emission System Leak Detected |
Armed with this information, we can approach the issue with a better understanding, supporting a more targeted and efficient repair process. Keep in mind, addressing the issue early can often prevent more significant damage to our vehicles and ensure we stay safe on the road.
Understanding OBD-II Codes
When we’re faced with a check engine light that blinks then stays on, it’s crucial for us to have a grasp of OBD-II codes.
OBD-II, or On-Board Diagnostics II, is a standardized system that’s been incorporated into most vehicles manufactured since 1996. These diagnostics play a pivotal role in keeping our cars running efficiently while also ensuring they meet emission standards. Here’s a breakdown of how these codes work:
- Powertrain Codes: Begin with P and represent engine and transmission issues.
- Body Codes: Start with B and are related to problems with interior functions.
- Chassis Codes: Leading with C, these pinpoint issues with the chassis system, including the antilock brakes.
- Network Communication Codes: Beginning with U, they indicate problems with the vehicle’s communication systems.
When a vehicle’s check engine light stays on, it has detected a fault that may influence the emissions system’s performance. To retrieve these codes, a scan tool or a code reader is necessary.
These are the elements of a typical OBD-II Diagnostic Trouble Code (DTC):
- The first character identifies which system has a fault—powertrain (P), body (B), chassis (C), or network communications (U).
- The second character specifies if the code is generic (0) or manufacturer-specific (1).
- The third character tells us the subsystem relating to the fault – such as emission management (1), injector circuit (2), or ignition (3).
- The final two characters provide us with specific information about the fault.
| Code Category | Description |
|---|---|
| P | Powertrain |
| B | Body Systems |
| C | Chassis Systems |
| U | Network Communication Codes |
Our scan tools offer not just the fault code but also an explanation of the code. This information assists us in understanding the nature and severity of the issue. Armed with this knowledge, we’re better prepared to either tackle the fixes ourselves or to explain the problem to a professional.
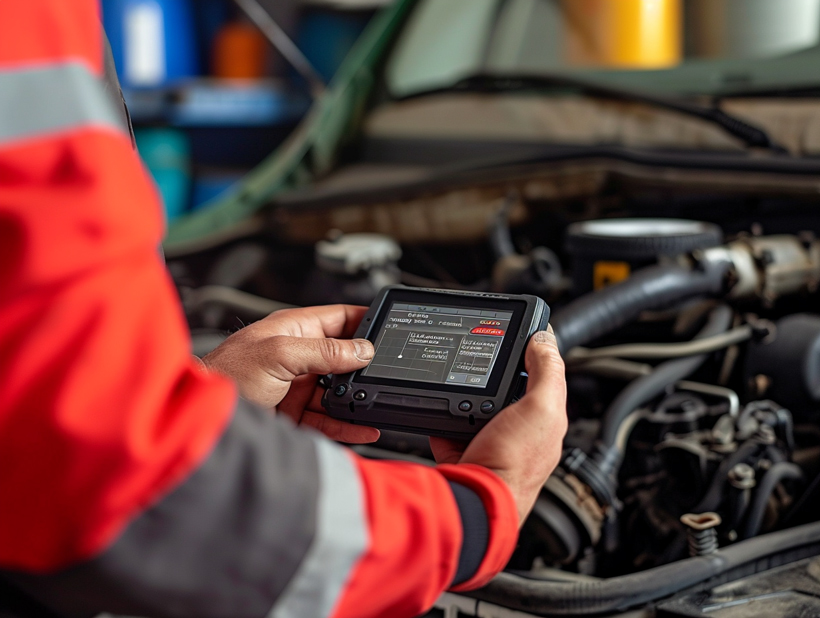
How to Access OBD-II Codes
Accessing OBD-II codes when your check engine light blinks and then remains illuminated is a straightforward process. We’ll guide you through the steps to help you understand what your vehicle is trying to communicate.
Locate the OBD-II Port
Your vehicle’s OBD-II port is generally found under the dashboard on the driver’s side. It’s a 16-pin connector that often lies within easy reach. Look for a trapezoidal shape that allows the scan tool to plug in snugly.
Connect the Scan Tool
Once you’ve located the port:
- Turn your vehicle’s ignition to the “On” position, but do not start the engine.
- Connect your scan tool or code reader to the OBD-II port. Make sure the connection is secure to ensure accurate data transmission.
Retrieve the Codes
After connecting the scan tool:
- Follow the device’s prompts to read the codes.
- The scan tool will display the codes, usually beginning with a letter followed by four digits.
- Record the codes for further analysis and troubleshooting.
Understand the Code Readings
Each code provides specific information about the fault:
- The first character identifies the code as powertrain (P), body (B), chassis (C), or network communication (U).
- The second digit signals whether it’s a generic code (0) or a manufacturer-specific code (1).
- The third digit pinpoints the system involved, like fuel and air metering or auxiliary emission controls.
- The final two digits give the specific problem number.
Analyzing the Data
With the codes in hand, we’ve got a clear path to follow. Analyze these fault codes:
- Consult your vehicle’s manual or an online database for meaning.
- Look for patterns or repeated codes which could signal deeper issues.
- Approach the problem with an educated perspective or engage a professional equipped with more advanced diagnostic tools.
Armed with this knowledge, we can decide on the best course of action to take. Whether it’s a DIY fix or a trip to the mechanic, understanding these OBD-II codes empowers us to make informed decisions about our vehicle’s health.
Interpreting OBD-II Codes
When the check engine light blinks and remains on, it’s crucial to accurately interpret the OBD-II codes retrieved from your vehicle. These codes follow a standardized format that alerts us to specific issues within the vehicle’s various systems. Let’s delve into understanding their structures and meanings.
Each OBD-II code consists of a single letter followed by four numbers. The letter denotes the system related to the issue:
- P for Powertrain, which includes the engine and transmission
- B for Body, involving components like seatbelts and airbags
- C for Chassis, which covers the framework and wheels
- U for Undefined, classifying data that doesn’t fit in other categories
Following the initial letter, the first digit indicates whether the code is generic or manufacturer-specific:
- 0 represents a standardized, universally applicable code
- 1 indicates a manufacturer-specific code tailored to your vehicle’s make
The second digit denotes the subsystem pertaining to the fault. For example, emission management or injector circuit issues, differing across manufacturers. The last two digits, however, are the specific fault index, offering a more direct insight into the problem. With these codes in hand, we can follow strategic steps to hunt down the exact concern with our vehicle.
Diagnostic Trouble Codes (DTCs) Breakdown
| Code Section | Description |
|---|---|
| First Letter | System Category |
| First Digit | Code Standardization (Generic/Manufacturer) |
| Second Digit | Subsystem |
| Last Two Digits | Specific Fault Index |
Armed with a basic understanding of OBD-II code structure, we can use online databases or our vehicle’s service manual to pinpoint the issue. It’s critical to remember that while a code suggests a particular sensor or part may be at fault, the underlying cause could stem from connected components. We must also bear in mind that solving these issues can involve intricate steps and sometimes require professional expertise.
Recognizing the severity of OBD-II codes is equally important. For instance, a blinking check engine light generally signifies a more serious condition than a steady one, often indicating a misfire in the engine that could damage the catalytic converter if not attended to promptly. By effectively interpreting these codes, we can undertake an informed approach to our vehicle’s maintenance and repair without the guesswork.
Addressing the Issue
When faced with a check engine light that blinks and then stays on, we know it’s crucial to address the issue promptly to prevent further damage to our vehicle. Understandably, we’re often tempted to continue driving, but this can lead to more serious problems down the road. Here‚Äôs what we should do immediately:
- Cease Driving: If the check engine light is blinking, it’s a sign of a severe problem, such as a misfiring engine that can damage the catalytic converter. Once it stays on, find a safe place to stop and switch off the engine as soon as possible.
- Check the Gas Cap: A loose gas cap can trigger the check engine light. Make sure it’s tightened properly. If this was the problem, the light should go off after a few trips.
- Refer to the Manual: Consult the vehicle’s owner’s manual. It might have specific instructions or warnings pertaining to the check engine light scenarios.
After noting these immediate steps, we’ll want to diagnose the issue further using an OBD-II scanner. Here‚Äôs an outline of how to proceed:
- Connect the scanner to the OBD-II port.
- Turn the ignition to the “on” position to power the scanner.
- Read the retrieved diagnostic trouble codes (DTCs).
- Use an online database or manual to interpret the codes.
Armed with this knowledge, we can decide whether to tackle the repairs ourselves or seek professional assistance. Should we choose to go to a mechanic, the interpreted codes will provide us with valuable information, ensuring they understand the potential issues even before they inspect the vehicle.
Keep in mind, the earlier we address the blinking check engine light, the more likely we’ll avoid expensive repairs.
Here’s a quick reference for common systems related to engine light codes:
| Code | System |
|---|---|
| P | Powertrain, including engine, transmission, and associated accessories |
| B | Body, which covers areas like seatbelts and airbags |
| C | Chassis, including the frame, steering, and suspension |
| U | Network and vehicle integration, like electronics and communication between systems |
Tracking and addressing these signals are part of responsible vehicle maintenance. Remember, the check engine light is our car’s way of communicating a need for attention‚Äîlet’s not ignore it.
Conclusion
We’ve armed you with the knowledge to tackle that blinking check engine light with confidence. Remember, it’s crucial to act swiftly to prevent further damage to your vehicle. Use an OBD-II scanner to pinpoint the problem and consult reliable sources to understand the DTCs. Whether you’re fixing the issue yourself or heading to a mechanic, you’re now prepared to ensure your car gets the care it needs. Keep up with regular maintenance and let’s keep those engines running smoothly.