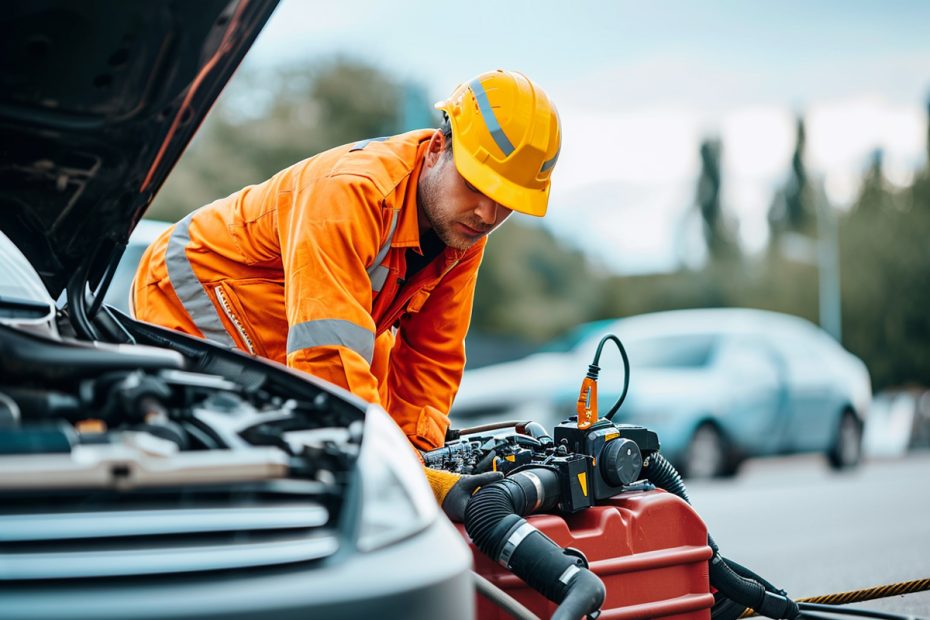
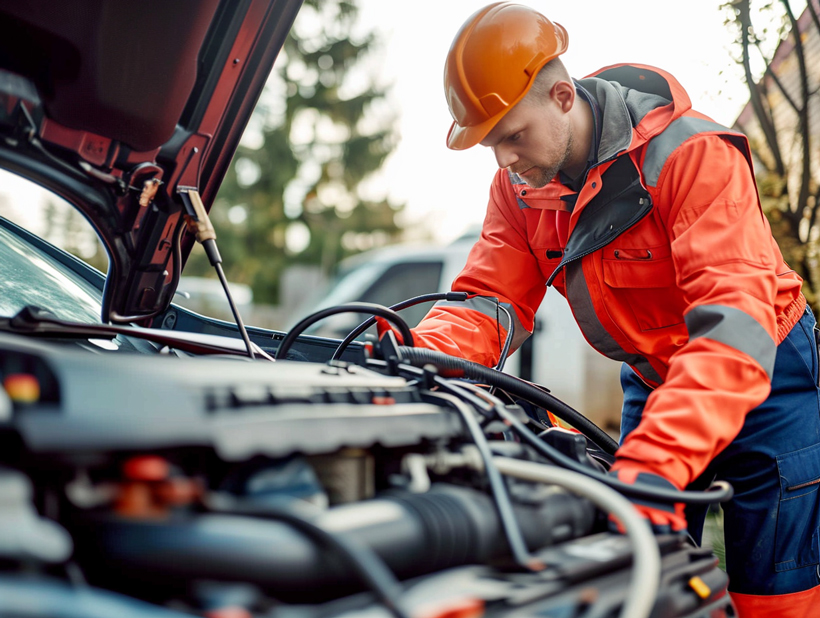
We’ve all been there: you turn the key, and instead of the roar of the engine, you’re greeted by a feeble click. A dead car battery is a roadblock I wouldn’t wish on anyone, but it’s not the end of the road. Knowing how to jump start your car is a skill that can get you rolling again in no time.
I’ll guide you through the safe and proper way to jump start a dead battery, ensuring you’re prepared should you ever find yourself in this common predicament. It’s a straightforward process, but safety is key‚Äîafter all, we’re dealing with electricity here.
Armed with a set of jumper cables and a helping vehicle, you’ll be back on the move before you know it. Let’s get you up to speed on jump starting your car safely and effectively.
Why Jump Starting a Car is Necessary
Sometimes, a car won’t start due to a dead battery‚ a dilemma I’m sure many of us have faced. Most modern cars rely heavily on electrical power, not just for starting the engine but also for basic functionality such as lighting, onboard computers, and even brakes and steering in some cases.
When the battery dies, the car is essentially lifeless. It’s unable to turn the engine over, and other systems are rendered inoperative. This is where jump starting becomes necessary. It’s a practical method to infuse life into a car’s dead battery, allowing you to get back on the road without the immediate need for a replacement battery or professional assistance.
Here are some situations highlighting the need for jump starting a car:
- Unexpected Battery Discharge: Batteries can lose their charge unexpectedly due to cold weather, leaving a light on, or simply because they’ve reached the end of their life cycle.
- Urgent Situations: You might be in urgent need to use your vehicle, and waiting for professional help isn’t a viable option.
- Cost-Effectiveness: Jump starting is a cost-effective solution that can save the expenses of towing services or immediate battery replacement.
- Readiness for Emergencies: Knowing how to jump start a car prepares you for those unforeseen moments, safeguarding against being stranded.
Understanding the basics of jump starting can also help in preserving the longevity of the battery. Recharging a battery by driving the vehicle for a period post jump start helps regenerate the battery’s charge. It’s a skill that doesn’t just serve as a temporary fix but can also contribute to the overall maintenance of your vehicle’s electrical system.
As an avid car owner, I’ve found that being familiar with your car‚Äôs electrical system and proper jump starting techniques ensures you’re equipped to handle battery issues independently. Plus, it’s a handy way to help fellow motorists who might encounter battery troubles on the road.
Essential Tools for Jump Starting a Car
In my experience dealing with unexpected car battery issues, there’s a set of essential tools that I always recommend keeping in your vehicle. These items are crucial when you’re facing a dead battery and can make the difference between being stranded and getting back on the road swiftly.
First and foremost, jump leads, also known as jumper cables, are the lifeline in a jump-start scenario. You’ll want a set that’s long enough to easily reach from your battery to another car’s battery and thick enough to handle the current‚Äîusually, cables with a gauge of 6 or 8 are a solid choice.
Another vital tool is a portable jump starter. This nifty gadget allows you to jump start your car without the need for another vehicle. It’s particularly useful if you’re in a deserted area. Make sure it’s fully charged and packed in your car for those just-in-case moments.
It’s smart to keep a basic toolkit in your trunk as well. Sometimes, the issue may be a loose battery terminal or another minor fix that a screwdriver or wrench can resolve.
For safety, always have a pair of heavy-duty gloves and safety glasses. Jump starting a car can be dangerous if sparks fly or if there’s acid on the battery terminals. These will protect your hands and eyes.
Don’t forget to keep the car’s manual handy. It provides specific instructions for your car model, which is particularly helpful if your battery is difficult to access or if there are special precautions you need to take.
Lastly, it’s not a bad idea to have a flashlight or headlamp with fresh batteries. You never know when you may need to jump start your car in the dark.
| Essential Tool | Purpose | Notes |
|---|---|---|
| Jump Leads | Connects two batteries for jump starting | Gauge 6 or 8 recommended |
| Portable Jump Starter | Allows for jump starting without another vehicle | Ensure it is fully charged |
| Basic Toolkit | Various car fixes | Includes screwdrivers, wrenches |
| Heavy-Duty Gloves | Hand protection | Use when handling cables |
| Safety Glasses | Eye protection | Important for safety |
| Car Manual | Model-specific instructions | Keep in vehicle |
| Flash |
Step 1: Position the Cars Correctly
Before attempting to revive a dead battery with a jump start, it’s crucial to position the vehicles properly to ensure a safe and successful process. I’ll walk you through the essential steps to get your cars ready:
- First, align both vehicles so that they’re close enough for the jump leads to reach, but not touching each other. This helps avoid any potential short circuits.
- Ensure that both cars are on a stable, flat surface and that the parking brakes are firmly set. This safety measure prevents any accidental rolling.
- Turn off all electrical components in both vehicles including lights, radio, and air conditioning. This step reduces the risk of electrical spikes.
- Check that the vehicles are either turned off or the engines are idle before you start connecting cables. This lowers the chances of a surge damaging the vehicles’ electronics.
Once the vehicles are in position, you’re effectively set up to begin the connection process. Remember, safety is paramount, so double-checking everything is in place is key before moving on to the next steps.
Moving forward, attaching the cables correctly is not only important for the success of the jump start but also to ensure you don’t damage the cars’ electrical systems. From proper cable placement to avoiding common pitfalls, understanding the intricacies of the jump start procedure will save time and prevent the frustration of repeat attempts. It‚Äôs important to be familiar with both the dead battery and the live battery you‚Äôre using for the jump. If you haven‚Äôt already, now‚Äôs the time to don those heavy-duty gloves and safety glasses that were mentioned earlier.
For the actual connection, there’s a specific order that I’ll adhere to ‚Äì connecting positive to positive and negative to a grounding point. Stick around to learn about these crucial details and the importance of cable sequence in the next section.
Step 2: Prepare the Battery
Before diving into the specifics, it’s crucial to prep the battery for a safe jump start. Proper preparation minimizes risks and ensures a smooth jump-starting process. Here’s what I always check:
- Battery Terminals: They must be clean and free of corrosion for good contact. A quick scrub with a wire brush can clear away any buildup.
- Voltage Match: Confirm that both vehicles have batteries with the same voltage. Most cars operate on a 12-volt system.
- Battery Access: Ensure that the battery terminals are easily accessible for the jumper cables.
I also make it a point to wear protective gear when handling a car battery. Safety glasses shield my eyes from potential sparks, and gloves protect my hands from battery acid.
Next, I follow these steps to prepare the battery:
- Identify the positive and negative terminals on the dead battery. They’re typically marked with a plus (+) for positive and a minus (-) for negative.
- Remove any covers from the battery terminals.
- If there’s significant corrosion, I’ll use a mixture of baking soda and water to clean the affected areas.
- Make sure to dry off the terminals before attaching any cables.
It’s important to remember that battery issues might not always be apparent. If I’m unsure about the condition of the battery or its terminals, I’ll consult the vehicle’s owner manual or seek professional assistance. Trust me, an ounce of prevention is worth a pound of cure when it comes to car maintenance.
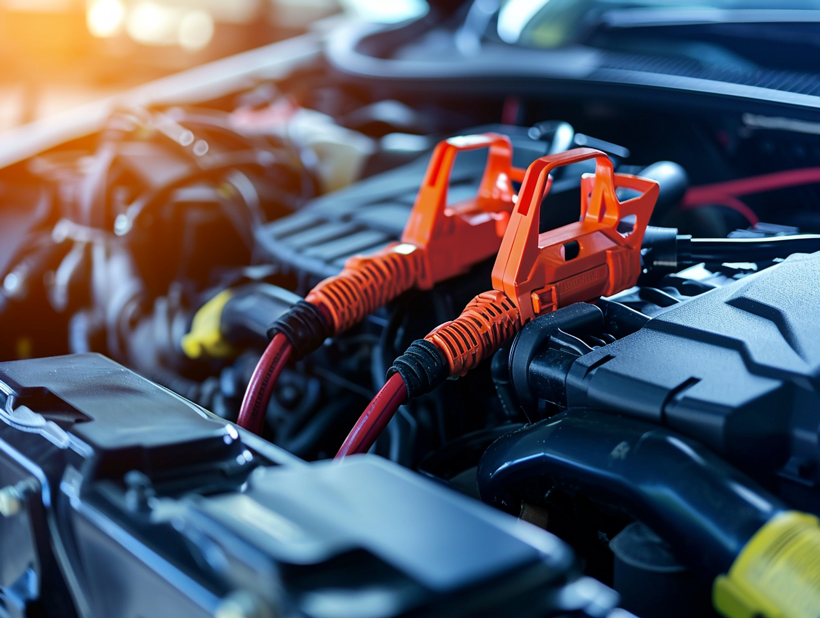
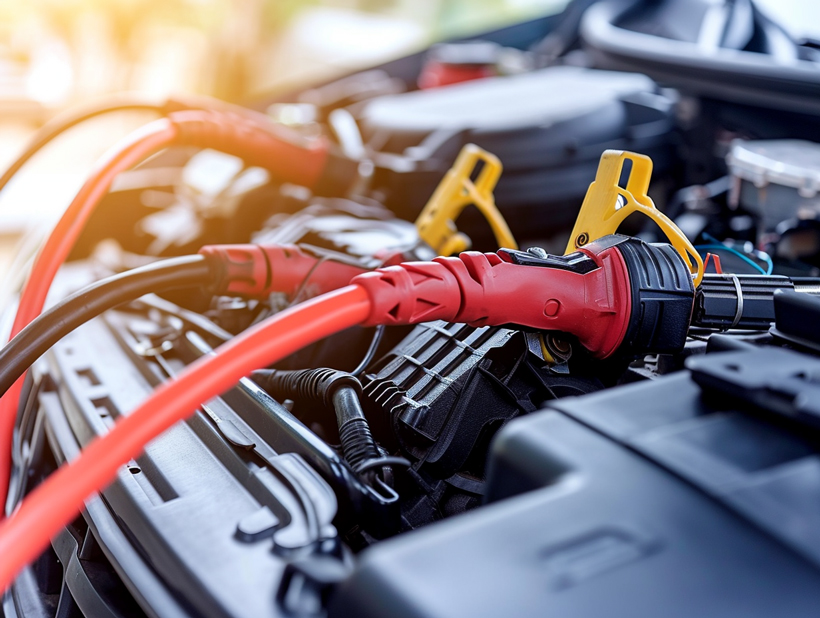
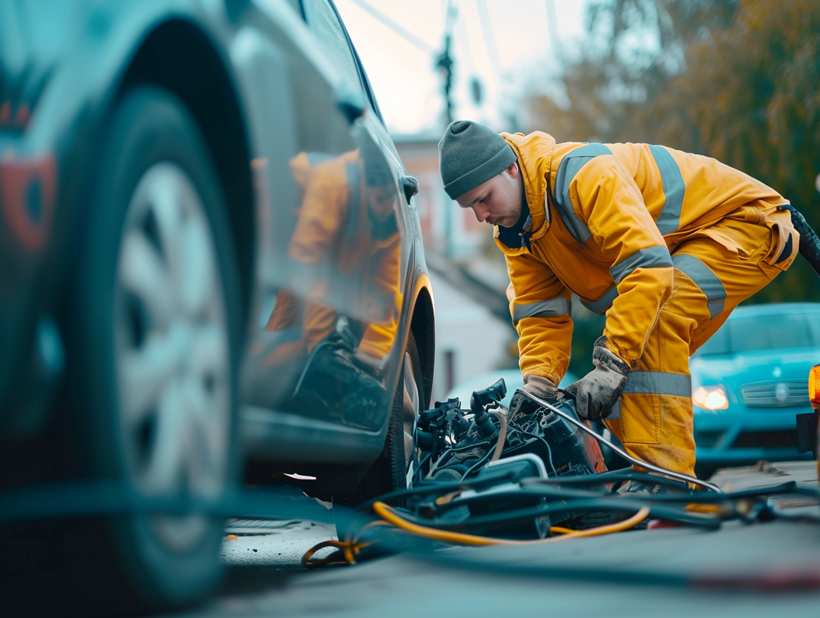
Step 3: Connect the Jumper Cables
Once I’ve made sure the batteries are prepped and accessible, it’s time to connect the jumper cables. Proper sequence is crucial here to avoid sparking or short circuits. Here‚Äôs the recommended order:
- Attach the red clamp to the positive terminal of the dead battery
- Connect the other end of the red clamp to the positive terminal of the good battery
- Secure the black clamp to the negative terminal of the good battery
- Finally, attach the other black clamp to an unpainted metal surface on the car with the dead battery, which serves as a ground.
I always take extra care to ensure that the clamps have a firm grip on the terminals or grounding point. It’s also critical that the cables do not dangle into the engine compartment where they could get tangled or damaged.
Once everything’s connected, I give the cables a once-over to confirm they’re not crossing each other‚Äîthey should be laid out to minimize the risk of them coming into contact with moving parts. It‚Äôs also a good practice to check if the jumper cables are rated for the current that the starter will draw. Most passenger vehicles are fine with standard cables, but trucks or larger vehicles might need cables with heavier gauge.
I then start the working vehicle and let it idle for a few minutes. The idea is to let the alternator charge the dead battery slightly before attempting to start the disabled vehicle. Patience is key here; a rush job increases the risk of a mistake or vehicle damage.
It‚Äôs important to mention that while jumper cables can be a lifesaver, their misuse can also lead to electrical system damage, so if there’s any uncertainty, seeking professional help is the safer bet. If everything looks good and the connections are secure, it‚Äôs just about time to attempt to start the car with the dead battery. Remember, once the engine is running, don‚Äôt turn it off right away ‚Äî let it run for a while to build up the battery charge.
Step 4: Start the Working Vehicle
Once I’ve ensured the jumper cables are securely attached and properly routed, the next crucial step is to get the working vehicle running. Starting the donor car serves a singular purpose: it begins charging the dead battery through the jumper cables. It’s a simple yet essential part in the jump-starting process.
Before turning the key, I double-check that all accessories in both vehicles are off. This includes the radio, lights, air conditioning, and the defroster. Draining energy on non-essential systems may hinder the charging efficiency. With that taken care of, I start the working car’s engine and let it idle for a few minutes. The idea here is not just to provide an initial charge but to also enable the alternator to generate adequate electricity.
During this idle period, it’s important I monitor both vehicles:
- Listen for unusual noises.
- Observe the dashboard of the donor vehicle for any warning lights.
- Check the battery connections if the car doesn’t start normally.
I‚Äôd advise against revving the engine excessively; it doesn’t enhance the charging process and could add unnecessary strain to the vehicle’s engine. A steady, moderate idle speed is sufficient for the alternator to do its job effectively. Here‚Äôs a quick table that I follow for the idling timeframe:
| Engine Size | Recommended Idle Time |
|---|---|
| Small (1.0 – 1.6L) | 3-5 minutes |
| Medium (1.7 – 2.4L) | 5-7 minutes |
| Large (2.5L and above) | 7-10 minutes |
These intervals help in building up a minimal charge in the dead battery, making it more amenable to a successful start-up. Remember, the goal is not to fully charge the battery but to provide it with enough juice to crank the engine on its own.
During this process, it’s best to stay by the cars. This way, I can quickly respond if any issue arises and ensure everything is operating smoothly‚Äîthe last thing anyone wants is creating another problem while solving the current one.
Step 5: Start the Dead Vehicle
Once the donor vehicle has been running for a few minutes, it’s time to attempt to start the car with the dead battery. Here are the steps to follow:
- First, make sure all accessories are still off in both cars to maximize power flow to the starter.
- Next, I turn the key in the ignition of the car with the dead battery. Do not get discouraged if it doesn’t start right away.
- If the car doesn’t start after the first try, wait a minute or two before attempting again. This allows the dead battery to receive a bit more charge.
If the vehicle with the dead battery starts up:
- Keep the now-running vehicle’s engine on for at least several minutes to allow the alternator to charge the battery.
- Slowly revving the engine may help, but I avoid doing that excessively as it can cause more harm than good.
If it’s still refusing to start:
- Check the connections to ensure they’re secure and make adjustments as needed.
- Consider whether you may need a longer charging period with the donor car’s engine running, especially if it’s cold out or the battery is particularly old or discharged.
In some cases, the dead battery might be beyond recovery:
- It’s essential to know when to call it quits and seek professional help.
- A continuously failing starting attempt could also indicate deeper issues unrelated to the battery.
Remember, safety is always the priority:
- If you’re unsure about any part of the process, it’s best to consult with a professional.
- Throughout the process, I make sure to keep an eye on the battery and the cables to prevent potential short circuits or overheating.
Starting a car with a dead battery isn’t just about following steps; it’s about being attentive and responsive to the vehicle’s needs as they arise. Whether the car roars to life or persistently refuses to start, the key is to remain patient and methodical throughout the jump-starting process.
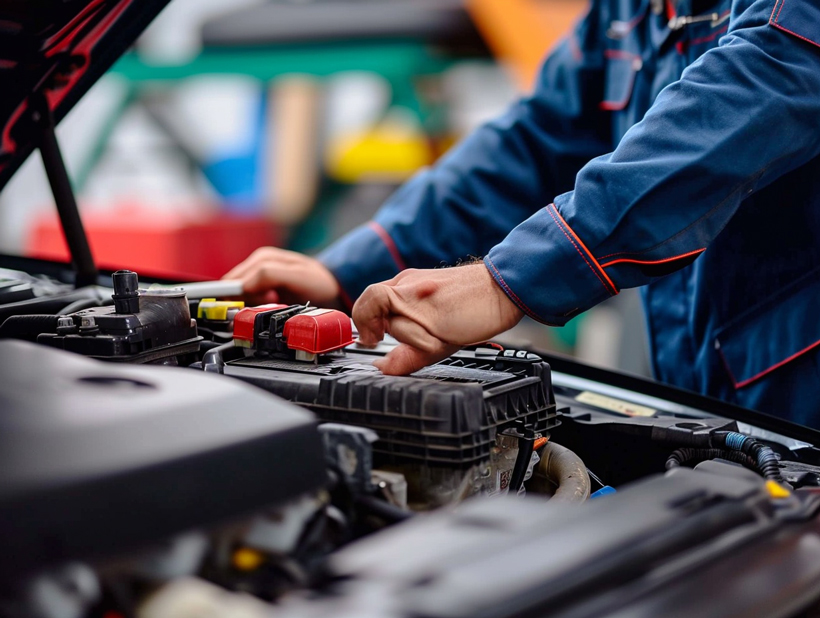
Step 6: Remove the Jumper Cables
Once my car’s engine is humming and stability is assured, it’s time to disconnect the jumper cables. This is a critical step to prevent any electrical sparks or potential accidents. Here’s how I carefully remove the cables, reversing the connection sequence:
- Turn off both vehicles’ engines to ensure no electrical current is flowing.
- Detach the negative clamp from the previously dead car. I make sure to place it away from any metal to avoid unwanted contact.
- Remove the negative clamp from the donor car’s battery. As with the first step, it’s essential to keep this clamp isolated.
- After both negative clamps are safely disconnected, I proceed to unhook the positive clamp from the donor car’s battery.
- Finally, disconnect the positive clamp from the revived car’s battery.
During this process, I’m mindful to ensure that the clamps do not touch each other or any vehicle parts except the designated battery terminals. It’s also vital to prevent the cables from dangling into engine compartments where they could entangle with belts or other moving parts.
Once the jumper cables are removed, I store them properly, untangled, and ready for any future use. It’s a good practice to keep the jumper cables accessible in the car, as they’re an essential tool for emergency situations.
If the car seems to be running smoothly after a few minutes, I know that my work here is done. However, this doesn’t mean it’s all clear. It’s crucial to monitor the vehicle over the next few drives. Potential signs of a failing battery or alternator include dimming headlights or difficulty starting the car. Should any of these symptoms persist, I’m aware that a visit to an auto technician may be necessary. They can perform a thorough battery and charging system check to ensure everything is functioning as it should.
Remembering that jumper cables are not a cure-all for battery issues but a temporary fix is key. Regular maintenance and timely battery replacement will go a long way in preventing future jump starts.
Safety Precautions to Keep in Mind
When you’re faced with a dead battery, knowing how to jump-start your car is invaluable. But what’s even more critical is being aware of the safety measures to prevent harmful accidents. I’ve compiled some essential safety tips that you should always keep in mind before you start the jumper cable process.
Wear Protective Gear: Before you begin, make sure to put on protective glasses and gloves. Car batteries contain sulfuric acid, which can be dangerous if it makes contact with your skin or eyes.
Inspect the Batteries: Always check both batteries for any signs of damage, leaks, or cracks. If you notice any of these issues, it’s best to avoid jump-starting the car as it may be hazardous.
Keep an Eye on Battery Polarity: Make sure to identify the positive and negative terminals clearly. Connecting cables to the incorrect terminals can cause serious damage to both vehicles’ electrical systems.
Avoid Flames and Sparks: Be cautious and keep any flames or sparks away from the battery region. Batteries emit flammable hydrogen gas, which can ignite and cause an explosion if exposed to a spark or flame.
Ensure Proper Ventilation: If you’re jump-starting a vehicle in a garage, always make sure the garage door is open to allow any built-up gases to dissipate safely.
Follow the Correct Order: When attaching and removing jumper cables, there’s a specific sequence you should follow. I’ve outlined this before, but it bears repeating ‚Äì adhering to the correct order is crucial for safety.
| Step | Connection | Action |
|---|---|---|
| 1 | Positive dead battery | Attach first |
| 2 | Positive good battery | Attach second |
| 3 | Negative good battery | Attach third |
| 4 | Ground on dead car | Attach fourth |
| 5 | Reverse order | For removal |
By keeping these precautions in mind and following the outlined steps, you’re on the right path to reviving your car’s dead battery safely. Remember, taking the necessary safety measures not only protects your car but also ensures you can get back on the road without unnecessary risks.