
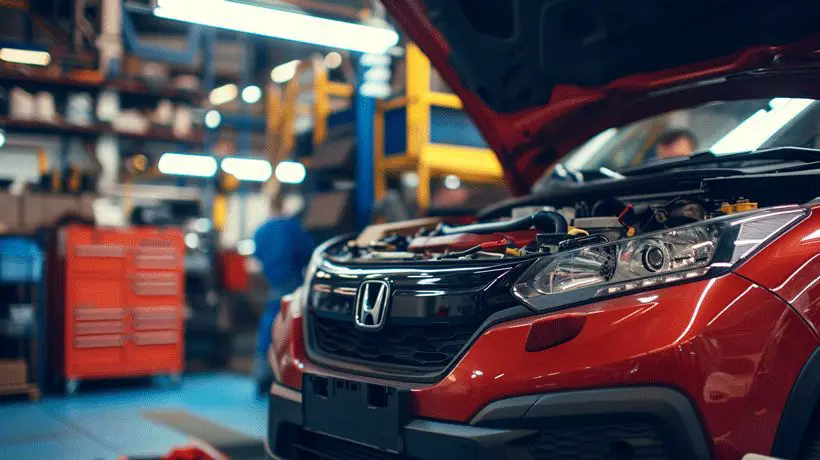
Discovering a pool of oil under your car can be alarming. We’ve all been there, questioning if it’s a serious problem or a minor leak. It’s essential to address these leaks promptly to keep our vehicles running smoothly.
External oil leaks are not just a nuisance; they can lead to significant engine damage if ignored. We’ll guide you through identifying and tackling these pesky drips, so you can protect your car and your wallet.
Spotting an oil leak when parked overnight is the first step in a process that we’re here to simplify. Stay tuned as we dive into the common causes and solutions for external oil leaks, ensuring your ride stays in top shape.
Identifying the Problem
When we’re tackling the challenge of an oil leak, identifying the root cause is critical. The first sign that indicates an issue is often a dark puddle beneath the car after it’s been parked overnight. Before we jump to conclusions, let‚Äôs make sure we’re dealing with an oil leak. Here‚Äôs how we can pinpoint the problem:
- Check the Color: Oil is generally amber to dark brown, depending on its age and cleanliness. If the liquid on the ground matches this description, it’s likely oil.
- Inspect the Consistency: Feel the liquid; engine oil is slick and slightly sticky.
- Sniff Test: Oil has a distinct, somewhat burnt odor.
Once we‚Äôve established that it’s indeed oil, we need to locate the source. Starting with the most accessible areas, look for signs of leakage around:
- Oil filter
- Oil pan drain plug
- Valve cover gaskets
These are typical spots that can give us trouble and start dripping oil when seals or components degrade or get damaged. A bright flashlight and a keen eye might reveal fresh oil traces, which are shiny and not covered in road grime like the rest of the engine components. For hidden or difficult-to-reach areas, we might consider using a dye test. This involves adding a special dye to the oil, which becomes visible under UV light, pointing us directly to the leak.
Moreover, we shouldn’t overlook the role of perishable car parts. Gaskets, hoses, and seals all deteriorate over time. Temperature fluctuations, age, and wear can lead to these parts failing to seal properly, resulting in oil leaks.
To add to that, here’s a breakdown of some common issues and which part of the vehicle they generally affect:
| Common Issue | Affected Vehicle Part |
|---|---|
| Degraded Seals | Around Engine Components |
| Loose Drain Plug | Oil Pan |
| Worn Out Gaskets | Valve Covers or Oil Pan |
| Cracked Oil Pan | Underneath the Engine |
By methodically checking these areas and components, we’ll make headway towards solving the oil leak puzzle without guesswork. Keep in mind, the exact location and the severity of the external oil leak can vary, but diligent inspection and a little patience go a long way toward keeping our cars in tiptop shape.
Common Causes of External Oil Leaks
Discovering an oil spot under your car after it’s been parked overnight can signal an external oil leak. Determining the cause is vital for maintaining vehicle health and functionality. External oil leaks can stem from several sources, and we’ve outlined some of the most common culprits below.

Worn Seals and Gaskets
Over time, the seals and gaskets that keep oil contained within your vehicle’s engine can degrade. Factors such as temperature changes and engine heat contribute to the wear and tear on these components. Various vehicle parts rely on seals and gaskets to function properly:
- Oil Pan Gasket: Seals the oil pan to the bottom of the engine
- Valve Cover Gasket: Ensures a tight seal between the valve cover and engine block
- Camshaft Seals: Located at the end of the cylinder head, these keep oil from leaking past the camshaft
Damaged Oil Pan
The oil pan, situated at the bottom of your engine, can become damaged from road debris or a lack of undercarriage clearance. Even a small puncture can lead to a significant oil leak.
Improper Oil Filter Installation
An oil filter that’s incorrectly installed may not seal properly, causing oil to seep out. This is often due to:
- Cross-threading during installation
- A missing or damaged gasket on the new filter
- Over-tightening or under-tightening the filter
Failed Hose Connections
Oil leaks can also occur at the various hose connections within the engine compartment. Hoses deteriorate or can be knocked loose, causing oil to escape from the system.
Below is a table summarizing the key areas to check when you suspect an external oil leak:
| Part to Check | Potential Issue | Sign to Look For |
|---|---|---|
| Seals & Gaskets | Wear & Tear | Oil build-up around engine block |
| Oil Pan | Physical Damage | Drips coming from bottom of engine |
| Oil Filter | Installation Error | Oil residue around filter housing |
| Hose Connections | Deterioration or Disconnection | Oil stains along the hoses |
Signs of an Oil Leak

When your car leaves that telltale stain on the driveway, it’s essential to recognize the signs of an oil leak promptly. Identifying an oil leak early can prevent more significant issues down the line. Here’s what we should look for:
- Dark Puddles Underneath the Car: One of the most obvious indicators is a dark brown or black puddle forming under the center or front of your vehicle. This typically suggests that oil has leaked when the car was parked.
- Smoke From the Engine Area: If there’s a leak near exhaust components or the engine block, it might cause smoke as the leaking oil burns off.
- Oil Odor Inside the Car: A distinct oil smell inside the cabin could signal a leak that’s allowing fumes to enter through the ventilation system.
- The Engine Oil Light on the Dashboard: An illuminated oil light may indicate low oil levels, often due to a leak. It’s crucial we check this as soon as possible.
Periodically checking for signs of a leak can save us time and money in repairs. Let’s also keep an eye on these areas:
- Engine Oil Level and Condition: Make it a habit to perform regular checks on your oil level and condition. If the level drops quickly or the oil appears dirty sooner than expected, there might be a leak.
- Oil Filter and Oil Cap: Verify the oil filter is properly seated, and the oil cap is tight and intact. Misalignment or damage here can lead to leaks.
Regular maintenance is our best line of defense to prevent and identify oil leaks. Routine checks give us the opportunity to catch a minor issue before it turns into a major repair job. Maintaining our vehicle should include localizing and addressing the source of any leaks as part of their regular service regimen—keeping our cars in optimal condition and on the road where they belong.
Locating the Oil Leak
When we’re faced with an oil leak, pinpointing the exact source is critical for a successful repair. We need to understand that the leak can emerge from various components, such as gaskets, seals, or even the oil pan itself. Here’s how we can methodically track down that pesky leak.
First and foremost, we’ll want to clean the engine thoroughly. Any prior oil residue can obscure the source of the new leak, so it’s essential we start with a clean slate. We can use a degreaser and a brush to scrub off old oil spots from the engine block and surrounding parts.
Once the engine’s clean, we can then run the car to heat the engine, which will help the oil flow and potentially make the leak more noticeable. After letting it run for a few minutes, we’ll turn off the engine and inspect for fresh oil. Here are some key spots we shouldn’t overlook:
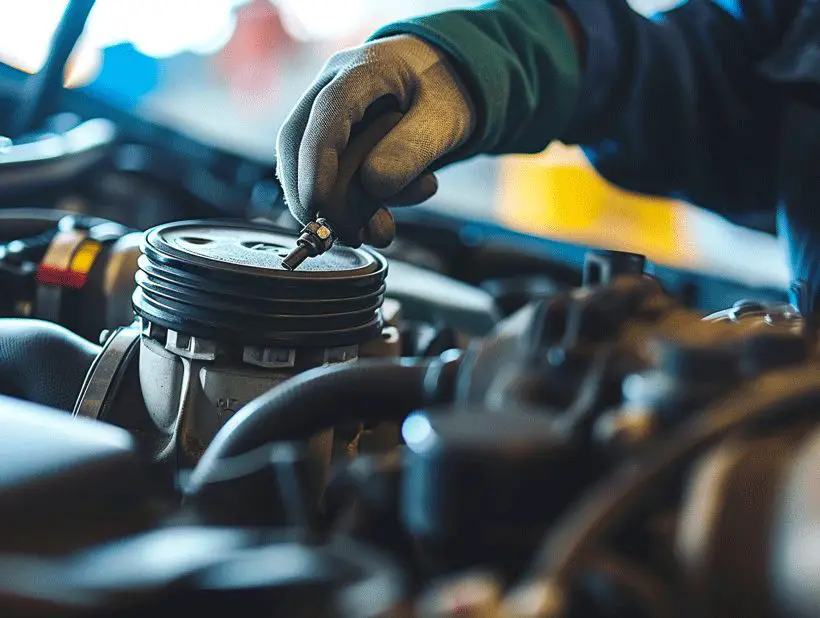
- Oil Filter: Occasionally, oil filters can become loose, or the seal could fail. If the filter isn’t properly tightened or if it’s old, an oil leak might not be far behind.
- Oil Filler Cap: A missing or loose cap can lead to oil splattering around the engine compartment.
- Valve Cover Gasket: These are notorious for wear and tear over time—cracks or breaks in this gasket can certainly lead to oil leaks.
- Oil Pan and Drain Plug: The oil pan can suffer from corrosion, and any damage here can cause a leak. The drain plug should also be checked for tightness and integrity.
A tip that works wonders is to use UV dye. When added to the oil, this dye can reveal hard-to-spot leaks under a UV light. If we’re still at a loss, this could be our ace in the hole.
It’s important to remember that an oil leak should never be taken lightly. Beyond the risk of environmental contamination, driving with a constant oil leak can swiftly lead to engine damage due to low oil levels. We must keep a close eye on the oil pressure gauge and oil level after we’ve identified and presumably fixed the leak, ensuring the fix was successful and that no new leaks have emerged.
Fixing the External Oil Leak
Once we’ve pinpointed the exact location of an external oil leak after the car has been parked overnight, the next step is to address the issue effectively. The process can vary depending on where the leak is coming from, but there are general strategies that tend to work well across the board.
If the leak is originating from a Gasket or Seal, it’s often best to replace it entirely. Over time, these components can degrade and no longer provide the tight seal necessary to keep oil contained. Many gaskets and seals are cost-effective and can be replaced with basic tools. However, some may require more labor-intensive work, especially if they’re located in hard-to-reach areas.
For leaks due to a Loose Oil Filter or drain plug, it’s usually a matter of simply tightening the component. It’s important to ensure that this is done to the manufacturer’s torque specifications to avoid over-tightening and potentially causing more damage.
In the case of a cracked Oil Pan, the solution can be more complex. A temporary fix might involve a cold-weld compound for metal, but this is usually seen as a short-term solution. A permanent fix would typically involve replacing the oil pan.
When addressing any kind of external oil leak, it’s essential we use the right tools and follow the repair procedures detailed in the vehicle’s service manual. Below are standard steps we should keep in mind:
- Verify the correct part or gasket is on hand before disassembly.
- Drain any oil that may interfere with the repair process.
- Clean the area thoroughly before and after the repair is completed.
- Use proper tightening sequences and torque settings as recommended.
While undertaking these repairs, it’s also prudent to check for other potential issues that may cause leaks in the future. Regular inspection and maintenance go a long way in preventing oil leaks and safeguarding the engine’s performance.
Conclusion
We’ve walked you through identifying and addressing external oil leaks that can surprise you after your car’s been parked overnight. Remember, tackling the issue promptly can save you from more severe problems down the road. Whether it’s a simple tightening job or a full replacement, using the right tools and following proper procedures are key to a successful fix. Don’t forget, regular inspections are your best defense against unexpected leaks. Stay on top of your car’s health and drive confidently knowing you’ve got leaks under control.