
Overheating is a common issue that many drivers face. But when it happens unexpectedly and goes away, it can leave you scratching your head.
So, what are the causes of car overheating then going back to normal? They include insufficient coolant, a malfunctioning thermostat or a clogged radiator. The culprits could also be a failing cooling fan, water pump issues, engine oil problems, or a blockage in the engine.
This article will dive deep into the causes and solutions for engine overheating and returning to normal. We’ll also provide step-by-step guidance on addressing the issue and offer tips for prevention.
Causes of Engine Overheating Then Going Back to Normal
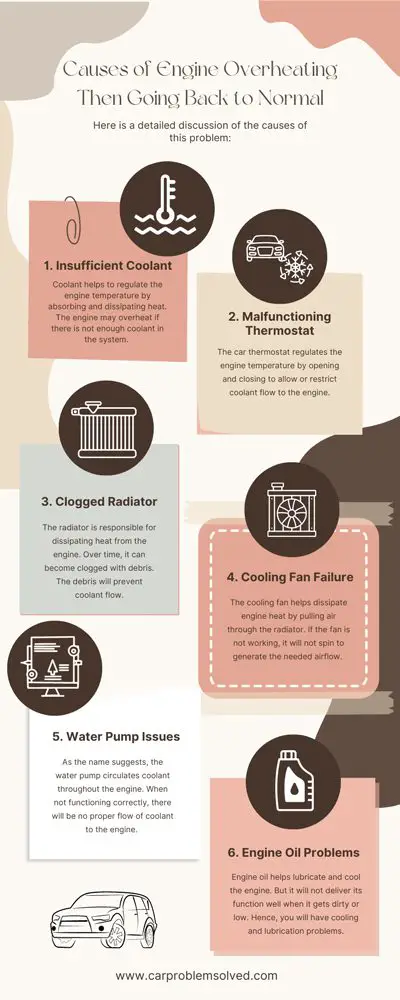
Here is a detailed discussion of the causes of this problem:
1. Insufficient Coolant
Coolant helps to regulate the engine temperature by absorbing and dissipating heat. The engine may overheat if there is not enough coolant in the system.
You can tell if this is the case if you have steam or smoke coming from the engine compartment. You will also have a sweet smell and a high-pitched whining noise.
2. Malfunctioning Thermostat
The car thermostat regulates the engine temperature by opening and closing to allow or restrict coolant flow to the engine. Coolant flow is restricted if the thermostat is stuck in the closed position. You will not have sufficient coolant on your engine, causing it to overheat.

Symptoms of this malfunction include a high-temperature sensor reading on your dashboard. You will also have erratic temperature readings on the gauge.
3. Clogged Radiator
The radiator is responsible for dissipating heat from the engine. Over time, it can become clogged with debris. The debris will prevent coolant flow. And with less coolant flowing, you will surely have an overheating problem.
This will be the cause of the problem if you have temperature differences across your radiator. You will also have a higher reading on your temperature gauge and a color change of your coolant.
4. Cooling Fan Failure
The cooling fan helps dissipate engine heat by pulling air through the radiator. If the fan is not working, it will not spin to generate the needed airflow. This will cause your car engine’s temperature to increase until it overheats.
Signs of a cooling fan failure include blades not spinning and temperature indicator warning lights. You will also have smoke coming from the engine compartment. You might also have problems with your AC system.
5. Water Pump Issues
As the name suggests, the water pump circulates coolant throughout the engine. When not functioning correctly, there will be no proper flow of coolant to the engine. This is a recipe for high engine temperatures.
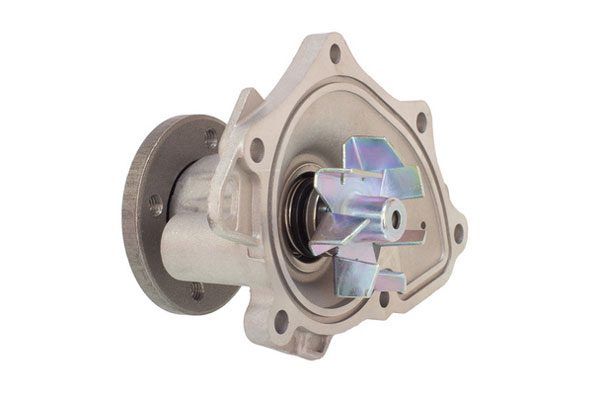
With this malfunction comes a high-temperature reading, a misty radiator and smoke from the engine compartment. You will also have a high-pitched whining noise and leaks from the pump.
6. Engine Oil Problems
Engine oil helps lubricate and cool the engine. But it will not deliver its function well when it gets dirty or low. Hence, you will have cooling and lubrication problems.
Signs of engine oil problems include misfires and strange noises coming from the engine. Once the engine overheats, your gauge will have a high-temperature reading.
Step-by-step Guide on How to Fix Engine Overheating and Going Back to Normal

You can take some steps to diagnose and address the issue before it leads to major engine damage. They include:
Step 1: Pull Over Safely
- As soon as you notice your engine overheating, safely pull over to the side of the road or into a parking lot.
- Turn off the engine and let it cool down for at least 30 minutes before attempting any further action.
Step 2: Top up the Coolant
- Once the engine has cooled down, check the coolant level in the radiator.
- Ensure the coolant level is between the minimum and maximum marks on the reservoir.
- If the level is low, add more coolant to the radiator. Do not even think of removing the radiator cap when the engine is hot. When the engine is hot, you have a pressurized coolant that can cause burns if the cap is opened.
Step 3: Check for Coolant Leaks
If the coolant level drops down rapidly after topping it up, there may be a leak in the cooling system.
- Check for any visible signs of coolant leaks, such as wet spots or puddles underneath the car or a sweet smell.
- Drain your coolant to start fixing the leaks.
- Use epoxy to seal the cracks and holes instead of purchasing replacements.
- If repair is not possible, just replace the damaged components. Be it a damaged hose, clamp, gasket, seal, and so on. You only need to remove the damaged component and reinstall a new one of the same size in the same spot.
- Refill the coolant and test if fixed.
Step 4: Repair the Thermostat
- To check if the thermostat is the cause of the overheating, start your car and wait until it is at the engine operating temperature.
- Look through the neck of your radiator filler. Ensure that the coolant is flowing. If not, the thermostat is malfunctioning.
- To repair the thermostat, start by locating it. It’s typically located in a housing at the engine end of the upper radiator hose.
- Drain some coolant from the system to avoid spilling when removing the thermostat housing.
- Remove the housing and take out the old thermostat.
- Replace it with a new one, reinstall the housing, and add fresh coolant to the system.
Step 5: Fix the Water Pump
- Inspect the drive belt for any signs of wear or damage. The drive belt connects the water pump to the engine and drives it to circulate coolant.
- If the belt looks worn or damaged, it may slip, causing the water pump to malfunction.
- Replace the belt if necessary. To do so loosen the tensioner bolt and slide the old belt off the pulley. Replace with a belt of the same size. Adjust the tensioner bolt so that the new belt is tight and secure.Finally, start the engine to test if it has been fixed.
- If not fixed, check the water pump for leaks or any signs of wear.
- Look for coolant leaks around the water pump or any signs of rust or corrosion on the pump’s housing.
- Replace the water pump if it’s worn or damaged. You will need to drain the coolant and remove the belt or any other components blocking access to the pump. Unbolt the old water pump and clean the area to remove any debris. Install the new water pump, reinstall the belt and other components which you removed. Finally connect the hoses and wires. Test to see if this fixed the problem.
Step 6: Check the Radiator
- Look for any visible signs of damage, such as cracks or leaks.
- If you notice any visible cracks, smear them with radiator epoxy.
- Also, check for any obstructions blocking the airflow through the radiator. Leaves, debris, or other materials can accumulate on the radiator’s surface, reducing airflow and causing overheating.
- Use a soft brush or compressed air to remove any debris from the radiator fins.
- If the damage is above repair you will need to replace the radiator. So, start by disconnecting the battery and draining coolant. Next, disconnect all the hoses and unbolt the radiator. Lift it out and install the new one on the same position. Reconnect all the hoses and removed components. Refill the coolant and test if the replacement fixed the issue.
Step 7: Check the Cooling Fan
- The first step is to check the fan belt for any signs of wear or damage.
- If damaged replace it by losing the bolts that hold the alternator using a wrench. This will allow you to remove the belt and replace with a new one. Once replaced, adjust the position of the alternator until the belt is tight. Tighten the alternator bolts to secure it in place.
- Next, inspect the fan blades for any signs of damage or cracks. If you notice any damage, replace or replace the fan blades. Start by disconnecting the battery. You will then need to remove the fan clutch. Unscrew the damaged blades and replace them with new ones. If the damage is minor, you can glue the cracks and sand them.
- Don’t forget to check the electrical connections to the fan motor for any loose or damaged wires.
- Test with a multimeter, replace damaged wires and tighten those loose using a pliers. To replace the worn-out wires, disconnect the battery and remove the wire in question. Replace it with a new one, soldering it on the same terminals as the old connections.
Preventive Tips to Avoid the Issue in Future

We recommend doing the following preventive maintenance tips to avoid the issue:
- Regularly check and maintain the coolant level
- Inspect the radiator for leaks and blockages
- Ensure the radiator fan is working correctly
- Check the thermostat for proper functioning
- Replace worn-out or damaged hoses and belts
- Avoid driving in heavy traffic or idling for long periods
- Use higher-grade engine oil to improve cooling performance
- Clean the air intake and filter regularly to ensure proper airflow
- Use a coolant with the appropriate water mix and antifreeze for your climate
Conclusion
So, there you have them – the causes and solutions of the overheating problem. Proper diagnosis and regular maintenance can prevent or resolve this issue before causing any significant damage.
Always pay attention to warning signs such as the temperature sensor warning, misty radiator and engine misfires. Remember to exercise caution when attempting any DIY fixes. If in doubt, seek the assistance of a professional mechanic.