If you’ve ever felt that heart-stopping moment when your car takes a beat too long to slow down, you know it’s time to check your brakes. I’ve been there, and trust me, ensuring your brake pads and rotors are in top shape is crucial for safe driving.
Replacing brake pads and rotors isn’t just for the pros; it’s a doable weekend project that can save you a bundle and keep you safe on the road. I’ll walk you through the steps, from identifying the signs of wear to the satisfaction of a job well done.
Signs of Brake Wear
Identifying brake wear is critical to maintaining your vehicle’s safety. Listen closely; unusual noises and physical symptoms can be the first indicators that your brake pads and rotors need attention.
- Squeaking or Squealing Noises: If you’re hearing high-pitched sounds when you apply the brakes, it’s likely your pads are worn out. Modern brake pads have wear indicators that emit these noises as a warning signal.
- Grinding Sounds: Hearing grinding metal suggests that your brake pads are completely worn down. In this case, the backing plate is pressing against the rotors, which may cause extensive damage.
Another sign to watch for is the feel of the brake pedal:
- Soft Brake Pedal: A spongy or soft pedal could signal that your brake pads are wearing thin. Additionally, it could point out air in the hydraulic system or, rarely, a brake fluid leak.
- Vibrations or Pulsating: When the brake pedal or steering wheel shakes during braking, it’s possible that your rotors have become warped from overheating or worn unevenly.
It’s also wise to conduct a visual check. If the pad thickness is less than 1/4 inch, it’s time for a replacement. In fact, inspecting the thickness regularly is vital. I recommend checking every 6 months.
In case your car pulls to one side while braking, it might not be just an alignment issue. Uneven brake pad wear or a stuck caliper could be the culprits, requiring prompt attention.
To gauge the health of your brake system, assess your stopping distance. An increase in the distance needed to halt your car suggests degraded braking performance, possibly due to worn pads or rotors.
Finally, dashboard warning lights, particularly the brake system warning light, should never be ignored. They’re designed to catch early signs of potential brake problems. If this light pops up, schedule an inspection immediately.
Maintaining a record of the encountered symptoms can assist in diagnosing issues accurately, ensuring that you stay ahead of brake wear and avoid any compromise in safety. Remember, regular maintenance not only extends the life of your brakes but also helps in avoiding costly repairs down the road.
Tools and Materials Needed
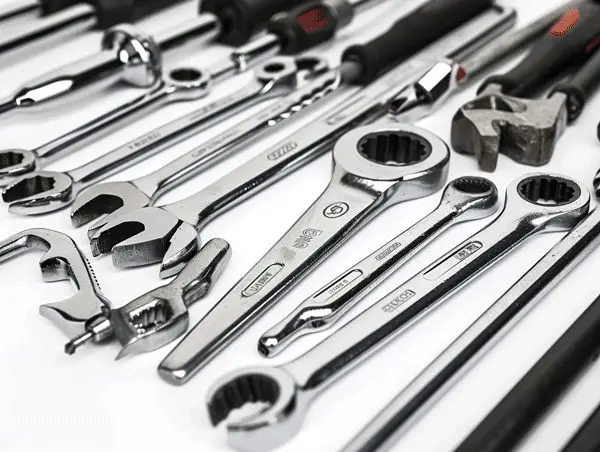
Before I dive into the details of replacing brake pads and rotors, it’s essential to gather all the necessary tools and materials ahead of time. Here’s what you’ll need to get the job done accurately and safely:
- Jack and jack stands: To safely lift and support the vehicle.
- Lug wrench: For removing the wheel.
- C-clamp or brake caliper tool: To retract the brake caliper piston.
- Ratchet and socket set: A variety of sizes are needed for different vehicles.
- Brake cleaner: To clean the brake components and prevent contamination.
- New brake pads and rotors: High-quality replacements ensure better performance and longevity.
- Brake caliper grease: To reduce noise and prevent sticking.
- Torque wrench: To ensure all bolts are tightened to the vehicle’s specifications.
- Brake pad spreader or a large adjustable wrench: To compress the caliper piston.
- Wire brush: To clean off rust and debris.
- Large adjustable pliers: For adjusting or holding parts in place.
When selecting brake pads and rotors, I recommend consulting your vehicle’s manual or a trusted professional to make sure you choose compatible parts. It’s important not to compromise on the quality of these components as they’re integral to the braking system’s overall performance and your safety.
Investing a little extra in top-grade tools can also make the replacement process smoother and prevent issues down the line. Make sure your workspace is clean, well-lit, and organized‚Äîthis not only streamlines the task but also helps me keep track of all the small parts involved. Armed with the right tools and materials, you’re now ready to tackle the task of replacing your brake pads and rotors with confidence. Remember, if you’re not comfortable performing this task, there’s no shame in seeking out a professional to ensure it’s done correctly. Safety always comes first, so never hesitate to ask for help if you need it.
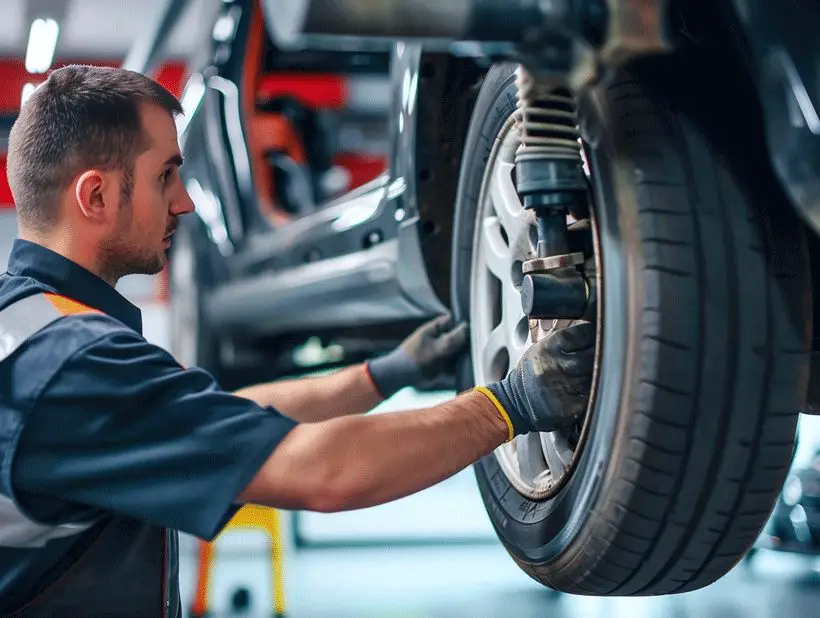
Preparing Your Vehicle
Before diving into the process of replacing your brake pads and rotors, there are several crucial steps to preparing your vehicle. Proper preparation not only ensures safety but also makes the entire process smoother.
Firstly, ensure your car is parked on a level surface and the parking brake is set. If your car has a manual transmission, place it in gear to prevent it from rolling. Gather wheel chocks and place them behind the wheels for added stability.
Materials Needed:
- Jack
- Jack stands
- Wheel chocks
- Lug wrench or impact wrench
Safety Equipment:
- Gloves
- Safety glasses
Once your car is secure, I’ll remove the wheel. Loosen the lug nuts with a lug wrench or impact wrench, then lift the vehicle with a jack. After achieving the appropriate height, I’ll place the jack stands under the car to support it. It’s essential to follow the manufacturer’s guidelines for jack stand placement to maintain safety. Only then will I fully remove the lug nuts and take the wheel off.
After the wheel is off, I’ll have full access to the brake assembly. It’s wise to inspect the entire brake system at this point. Look for any signs of wear and tear on the brake hoses and ensure there’s no brake fluid leakage. These details are crucial as they could indicate additional maintenance issues that might need addressing while you’re already working on the brakes.
Next, I’ll clean the exposed brake assembly with a brake cleaner spray to remove any brake dust and grime, which can interfere with the new components. Always use the cleaner in a well-ventilated area and avoid direct contact with the skin.
With everything cleaned up and the car securely in place, I’m ready to move on to removing the old brake pads and rotors. Remember, working methodically and safely is paramount in DIY car maintenance.
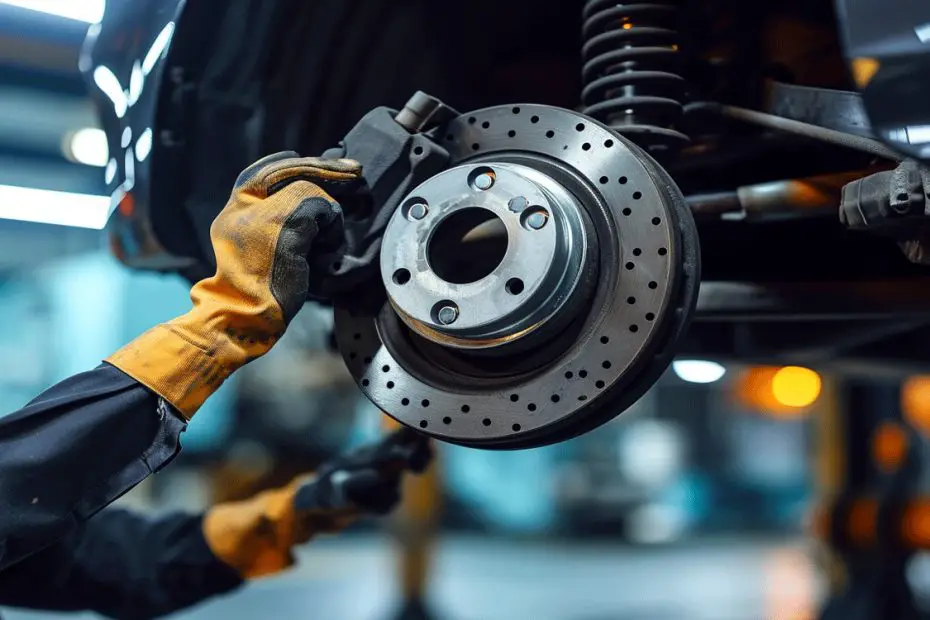
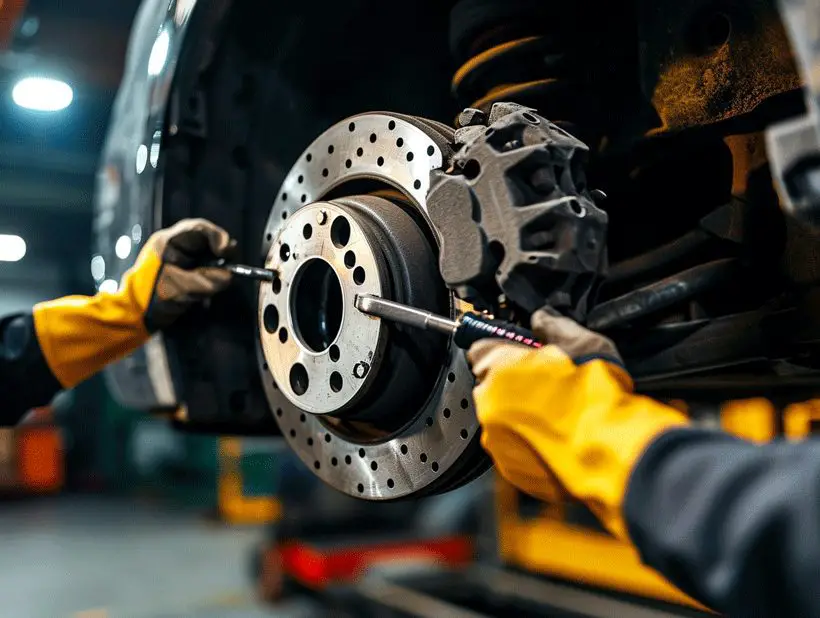
Removing the Old Brake Pads and Rotors
After ensuring the brake assembly is free from dirt and debris, I’m ready to tackle the old brake pads and rotors. It’s paramount to handle these components with care, as they are integral to the vehicle’s braking performance.
Step 1: Compress the Brake Caliper Piston
Before the old pads can be removed, I need to compress the brake caliper piston. This is done using a caliper piston tool or a C-clamp. Compressing the piston allows for the new, thicker brake pads to fit once the rotor has been replaced.
Step 2: Remove the Caliper Carrier Bolts
Next, I locate the caliper carrier bolts. These are typically found on the backside of the caliper. Using a ratchet and the appropriate socket size, I carefully remove these bolts. Once loose, I ensure to support the caliper to prevent strain on the brake hose.
Step 3: Extract the Old Brake Pads
With the caliper now unsecured, removing the old brake pads is manageable. They usually slide out of the carrier brackets with minimal force. I check the pads for uneven wear, as this can be an indicator of additional issues within the braking system.
Step 4: Unbolt the Rotor
If the rotor is held in place by screws or a locking hub, I remove these using the correct screwdriver or impact wrench. Depending on the vehicle make and model, the rotor may simply slide off the wheel hub. For rusted-on rotors, a few taps with a rubber mallet around the rotors circumference often help in loosening it.
Step 5: Remove the Rotor
After any fastening elements are detached, I can usually pull the rotor straight off the hub. I’ll be cautious of its weight, as it can be heavy and cumbersome. Any resistance might necessitate additional cleaning around the wheel hub or potentially the use of a rotor puller tool.
By carefully attending to each of these steps, I’m ensuring a smooth process in replacing brake components. Proper attention to detail here not only safeguards the efficiency of my vehicle‚Äôs brake system but also extends the lifespan of the new brake pads and rotors I’m about to install.
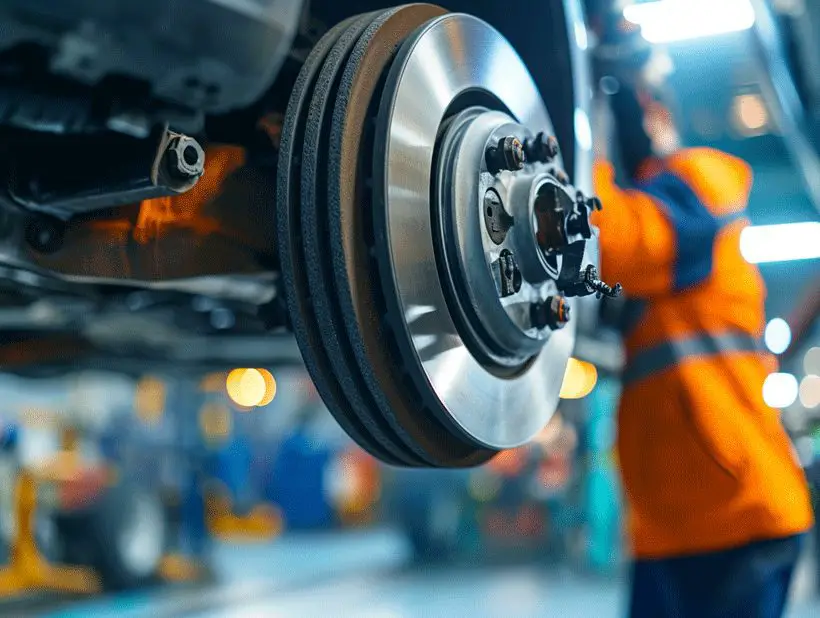
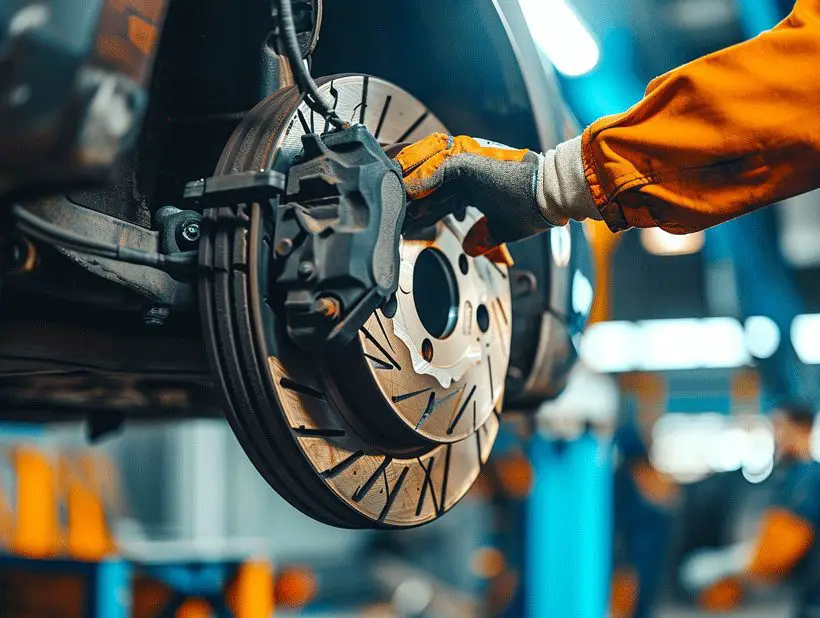
Installing the New Brake Pads and Rotors
After removing the old components, I’m ready to install the new brake pads and rotors. Prior to installation, I double-check that the new parts are the correct size and type for my vehicle.
Preparing the Brake Caliper and Hardware:
- I clean the caliper and caliper bracket using brake cleaner and a wire brush, ensuring all debris is removed.
- Then, I apply a thin coat of brake grease to the areas where the brake pads will slide.
Installing the New Rotor:
- Before fitting, I wipe down the new rotor with brake cleaner to remove any protective oil coating.
- I align the rotor onto the wheel hub and secure it in place, making sure it sits flush against the hub.
Fitting New Brake Pads:
- On the brake caliper bracket, I install the new hardware clips if applicable.
- After that, I place the new brake pads into the bracket with their friction material facing the rotor.
Reattaching the Brake Caliper:
- Using a caliper compressor tool, I ensure the piston is fully retracted into the caliper.
- I carefully position the caliper over the new pads and rotor, ensuring it doesn’t hang by the brake line.
- I thread and torque the caliper bolts to manufacturer’s specifications, referring to my vehicle’s service manual for the exact torque values.
Throughout the installation, I’m meticulous about keeping the brake parts clean and free from contaminants. This is a crucial step for maintaining the integrity of the braking system.
Now that the new pads and rotors are in place, it’s essential that I recheck all the components to ensure a snug and proper fit. This involves checking the seating of the pads, the alignment of the rotor, and verifying that all bolts are secure. It’s this attention to detail that will give me reassurance of a job well done and reliable brake performance.
Testing and Adjusting the Brakes
After installing the new brake pads and rotors, it’s essential to test and adjust the brakes to ensure optimal performance. Here’s a step-by-step process I follow to get this critical stage done accurately:
- Check the Brake Fluid Level: Before taking the vehicle for a test, I ensure the brake fluid reservoir is filled to the recommended level. This step is crucial for maintaining proper hydraulic pressure in the brake system.
- Perform a Stationary Brake Test: I start the engine and press the brake pedal a few times. This helps seat the brake pads against the rotors. I’m looking for a firm pedal feel that doesn’t sink to the floor, indicating there are no air bubbles in the brake lines and the hydraulic system is functioning correctly.
- Carefully Drive Test: I find a safe, traffic-free area to check the brakes under real-world conditions. During the initial drive, I apply the brakes at low speeds to ensure there’s no squealing, which could suggest incorrect installation or a need for additional greasing on certain parts.
- Adjust the Brake Balance if Necessary: If I notice the car pulling to one side during braking, it could mean the brake balance is off. To address this, I carefully adjust the brake calipers until the vehicle stops in a straight line.
- Bed-In the New Brakes: To properly bed-in the new brakes, which involves transferring a layer of brake pad material onto the rotor surface for optimal performance, I perform several stops from varying speeds, without coming to a full stop or inducing a skid.
During this testing and adjustment phase, I always remain conscious of the new components’ capabilities, breaking them in gently to avoid damage. It’s also imperative to monitor for any vibrations or unusual sounds that could indicate further attention is needed.
Maintaining vigilance and attentiveness throughout the testing and adjustment serves not only as a safety check but also lays the foundation for durable and reliable brake performance. It’s the difference between an adequate job and a professional-grade brake replacement. Remember, the goal is to achieve a responsive and reliable brake system that ensures peace of mind every time I hit the road.
Conclusion
Tackling brake maintenance yourself can save you time and money while giving you a sense of accomplishment. Remember, after fitting new brake pads and rotors, it’s crucial to test and adjust your brakes to maintain optimal performance. Always stay alert and cautious during your first few drives to ensure everything is working seamlessly. Properly bedding-in your brakes and keeping an eye on the brake fluid level are the final touches to a job well done. With your brakes now in top shape, you can hit the road with confidence knowing you’ve enhanced your vehicle’s safety. Stay on top of your brake system’s condition and you’ll be well-prepared for many smooth and secure stops on your journeys ahead.