Summer’s here, and the last thing we want is an AC that quits on us. But when you’re faced with a locked-up AC compressor, it’s not just the heat that’s oppressive‚Äîit’s the thought of having to deal with it. Don’t sweat it; we’ve got you covered.
We know how crucial a functioning air conditioner is to your comfort and sanity. That’s why we’re diving into the nitty-gritty of fixing a locked-up AC compressor. With our guidance, you’ll be on your way to reclaiming your cool oasis in no time.
Understanding the common causes and the right fixes can save you time and money. Let’s get that air conditioning working again, ensuring those sweltering days are met with the sweet relief of chilled air.
Common Causes of a Locked Up AC Compressor
When troubleshooting any car issue, identifying the root cause is pivotal. In the case of a locked-up AC compressor, several factors could be at play:
- Insufficient Lubrication: Like any mechanical component, an AC compressor requires adequate lubrication. Without it, internal parts may wear down, leading to seizure.
- Electrical Failures: Faulty wiring or issues with the compressor’s electrical components can hinder functionality.
- Contamination: Debris inside the system, such as dirt or metal shavings, can obstruct the compressor’s movement.
- Overheating: Prolonged use or a faulty cooling system might cause the compressor to overheat and lock up.
- Refrigerant Issues: Incorrect refrigerant levels, whether too much or too little, can have detrimental effects.

We must conduct thorough inspections to pinpoint the exact cause. Let’s delve into these issues with a little more detail.
Insufficient Lubrication can be a result of:
- Leakages in the AC system
- Using the wrong lubricant type
- Neglected maintenance schedule
Electrical failures stem from:
- Burnt fuses or relays
- Corroded connectors or wires
- Malfunctioning sensors or switches
Contamination often occurs due to:
- Poor maintenance practices
- Breakdown of compressor components
- Introduction of foreign particles during service
To handle Overheating, it’s essential to check:
- The condenser fan for proper function
- Airflow obstructions or debris buildup
- Operating pressures within the system
Lastly, Refrigerant Issues may involve:
- Leaks in the refrigerant lines
- Faulty service valve or schrader valve
- Inaccurate application of refrigerant charts
By staying aware of these common pitfalls, we stand a far better chance at not only diagnosing but also preemptively preventing compressor lock-up issues. Regular maintenance and addressing any problems promptly is the key to ensuring that our air conditioning systems continue to operate smoothly and efficiently.
Signs and Symptoms of a Locked Up AC Compressor

Identifying the signs of a locked up AC compressor is key to addressing the problem before it leads to further damage. We’ve gathered the most common symptoms car owners may encounter:
- Unusual Noises: If you hear rattling, grinding, or banging sounds from the AC unit, it could indicate internal damage or that the compressor is trying to start against the lock-up.
- No Cool Air: One of the most noticeable signs is when the air conditioning fails to produce cold air. This issue often stems from the compressor being unable to circulate refrigerant.
- AC Clutch Is Not Engaging: The AC compressor clutch engages and disengages the compressor. If it does not move, it can signify that the compressor is seized.
- Tripped Circuit Breaker: In cases where the compressor is drawing too much power, it may cause the circuit breaker to trip, indicating a potential lock-up situation.
- Visible Damage or Leakage: Upon inspection, you may find signs of leakage around the compressor or apparent physical damage which could relate to a compressor failure.
When you detect these symptoms, it’s crucial to act swiftly to prevent further issues. The next step entails conducting a detailed inspection, enabling you to pinpoint whether the compressor is indeed locked up. It’s here we should stress the essence of safety; ensure that the car is turned off and the keys are removed before any inspection is undertaken.
Throughout the process, keeping a keen eye for the above symptoms will guide you in diagnosing the compressor’s condition. Regular checks and prompt attention to any irregularities can save time and resources in the long run. Remember, addressing these symptoms quickly can keep you and your car cool on the road, especially during those sweltering summer months.
Should you be unsure of your findings or if the compressor appears locked, professional advice or service might be your best course of action.
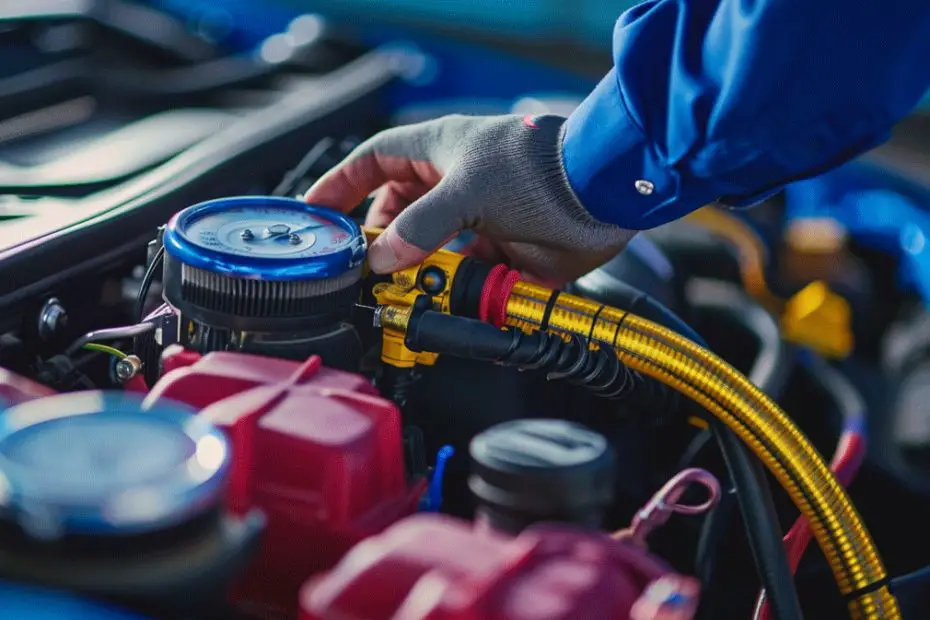
Step-by-Step Guide to Fixing a Locked Up AC Compressor
Dealing with a locked-up AC compressor can be a daunting task, yet it’s one we can manage by following a methodical approach. Let’s dive into the step-by-step process that can help us effectively tackle the issue and get our air conditioning system back in working order.

Assess the Situation
First, we need to diagnose the problem correctly. Checking for the symptoms we’ve discussed earlier, like strange noises or lack of cold air, is crucial. If we’ve established that the compressor is indeed the culprit, we’ll ensure that the car is turned off and that we’re wearing protective gear before we proceed.
Prepare the Necessary Tools
To work on the AC compressor, we’ll gather the right set of tools. Typically, this includes:
- A set of wrenches
- A socket set
- Multimeter
- Safety glasses and gloves
- Replacement parts (if necessary)
We must have all these tools at hand before starting the repair to ensure a smooth and uninterrupted process.
Discharge the AC System
Safety comes first when dealing with pressurized systems. We’ll cautiously discharge the AC system to prevent any accidents. It’s often recommended to have this done by a professional due to the risks involved with handling refrigerants.
Remove and Inspect the Compressor
After safely discharging the system, we’ll carefully remove the compressor from the vehicle. This will often involve:
- Detaching the compressor clutch wire
- Loosening the drive belt
- Unbolting the compressor from its mount
Once removed, we’ll inspect the compressor for any signs of damage, wear, or leakage. If repairable, we’ll replace the faulty components; if not, we’ll prepare to install a new compressor.
Install the New Compressor
If we’ve opted to replace the compressor, here’s how we’ll proceed:
- Mount the new compressor in place
- Bolt the compressor securely to the engine
- Reattach the drive belt
- Connect the compressor clutch wire
Recharge the AC System
With the new compressor installed, we’ll need to recharge the AC system with the appropriate type and amount of refrigerant. This step should align with the manufacturer’s specifications for our vehicle.
Tools and Materials Needed
Before we dive into the fixes, it’s essential to ensure we have all the necessary tools and materials at hand. Proper preparation can make the difference between a smooth repair process and an unnecessary trip to the hardware store mid-project.

Essential Tools
To tackle the task of fixing your AC compressor, you’ll need:
- Socket set: A comprehensive socket set is vital for loosening and tightening various bolts and nuts.
- Wrench set: A good set of wrenches aids in areas where sockets can’t reach.
- Screwdrivers: Including both flat-head and Phillips-head to manage different screw types.
- Pliers: Useful for gripping and bending materials that are tough to handle with fingers alone.
Specialty Tools
These are more specific to AC repair and may require a visit to an auto parts store:
- AC manifold gauge set: To monitor pressure levels within the system.
- Vacuum pump: Essential for removing moisture and air from the AC system.
- Refrigerant recovery machine: If you’re experienced, this machine is necessary to safely extract refrigerant.
Safety Equipment
We can’t stress enough the importance of safety. Remember to equip ourselves with:
- Safety glasses: To protect our eyes from any debris or refrigerant.
- Mechanic gloves: To safeguard our hands from sharp edges and chemicals.
Materials Needed
Beyond tools, we’ll need some materials:
- Replacement AC compressor: Only if ours is beyond repair.
- New refrigerant: To recharge the system.
- Compressor oil: Necessary for lubricating the compressor.
To streamline our repair process, it’s wise to arrange these items in our workspace beforehand. This ensures easy accessibility and a tidier environment, crucial for an efficient workflow. Remember, keeping our space organized will save us time and prevent any unnecessary frustration as we move through the repair steps.
By having these tools and materials ready, we’re poised to address a locked-up AC compressor effectively. Let’s keep our workspace orderly and press on to the next phase‚Äîdisassembling the AC unit.
Safety Precautions to Take
Before diving into the repair of your AC compressor, it’s crucial to prioritize safety. Dealing with car air conditioning systems involves certain risks, and taking the right precautions can prevent accidents and injuries.
Disconnect the Battery
Always start by disconnecting the battery. This simple act can save you from potential electrical shocks and prevents the compressor from engaging unexpectedly while you’re working on it.
Wear Protective Gear
Ensure you have the following protective gear on hand:
- Safety glasses to shield your eyes from debris
- Gloves to protect your hands from sharp components and chemicals
- Closed-toe shoes to safeguard your feet
Gathering this gear beforehand allows us to focus on the task without frequent interruptions.
Handle Refrigerant with Care
AC systems contain refrigerant, which requires careful handling due to its hazardous nature. It’s both illegal and dangerous to release refrigerant into the atmosphere. Make sure to:
- Use the appropriate equipment to recover the refrigerant
- Avoid skin and eye contact
- Work in a well-ventilated area to avoid inhaling fumes
If you’re not certified to handle refrigerants, it’s best to leave this step to a professional.
Be Cautious of High-Pressure Components
Air conditioning systems are high-pressure systems. We must be mindful when dismantling components to prevent injury from sudden depressurization. Always refer to the manufacturer’s directions for the correct depressurization procedure.
Check for Engine Coolness
Ensuring that the engine is cool can prevent burns and other injuries. Don’t attempt repairs immediately after driving as the engine and surrounding parts may be extremely hot.
Taking these precautions helps us work safely and effectively. It’s worth taking a few extra moments to prepare sufficiently rather than risking our well-being for the sake of speed.
Conclusion
We’ve walked you through the necessary steps to unlock your AC compressor and get your air conditioning back in action. Remember, safety is paramount and having the right tools at hand makes all the difference. With your workspace organized and safety measures in place, you’re well-equipped to handle the task. If you’ve followed our guide, your AC should be humming smoothly once again, ready to keep you cool on those hot days. Should you encounter any hiccups along the way, don’t hesitate to consult a professional. We wish you a successful repair and a comfortable, cool environment in your home or vehicle.