
If you’ve ever been haunted by the screech or whine of a failing accessory belt, you know it’s not something you can ignore for long. These belts are vital, driving everything from your alternator to your power steering pump. I’ll guide you through the signs of wear and the steps to replace them before you’re left stranded.
Knowing how to replace your accessory belts is a must-have skill for any DIY car enthusiast. It’s not just about saving money on mechanic fees; it’s about understanding and maintaining your vehicle’s health. I’ve got some tips and tricks up my sleeve that’ll make the process smoother and ensure you’re back on the road in no time.
Signs of Wear in Accessory Belts
When it’s time to peer under the hood, spotting the telltale signs of wear on your accessory belts is crucial for preventing a breakdown or costly repairs. I’ve learned to look for several indicators that suggest a belt may be on its last legs.
One of the most obvious signs of belt deterioration is visible wear and tear. If you notice any of the following symptoms on your belts, it’s time to consider a replacement:
- Cracks or frayed edges: Over time, belts can develop small surface cracks, particularly on the ribbed side. These can eventually deepen and cause the belt to snap.
- Glazing: This is a shiny, glossy appearance on the belt, which indicates it has been subjected to excessive heat or has been slipping.
- Material loss: Look for places where the belt seems thinner or has chunks missing.
- Stretching: Although less apparent, a belt that has lost its tension will require replacement as it may not properly drive the pulleys.
Another key indicator is abnormal noise. Here’s what to listen for:
- Squealing: Often heard when starting the engine or during acceleration, squealing can signal a belt that’s either loose or worn out.
- Chirping: A repetitive, high-pitched sound might indicate misalignment or wear.
It’s not only about what you can see or hear, though. The performance of vehicle components driven by the belt can also suggest issues:
- Battery charge: A slipping belt can lead to poor alternator performance, resulting in low battery charge.
- Air conditioning: If your AC is underperforming, the culprit could be a worn serpentine belt.
- Power steering: Struggling more than usual with the steering wheel? It could be a sign your power steering belt needs attention.
Checking the tension is another step you shouldn’t skip. A proper tension test requires a bit of pressure with your thumb to assess the give. Typically, half an inch of play is acceptable, but this can vary depending on your vehicle’s specifications. If a belt seems overly loose or tight, consider this a red flag.
Tools and Materials Needed for Replacement
Before tackling the task of replacing an accessory belt, it’s vital to gather all the necessary tools and materials to ensure a smooth process. Having everything on hand can save time and the hassle of running to get a tool in the middle of the job.
- Serpentine belt tool or a long-handled socket wrench
- Correctly sized sockets and wrenches
- New accessory belts (always double-check belt sizes and types for your specific vehicle)
- Work gloves to protect your hands
- Safety glasses to keep debris out of your eyes
- Lighting, such as a flashlight or work light, for better visibility
I always recommend having a digital camera or smartphone at hand. Snapping a photo of the belt’s routing before removal can serve as a handy reference when installing the new belt‚Äîa step new DIYers may overlook but can save them from future headaches.

Replacement belts are the centerpiece of this process. Opt for high-quality belts that can withstand the heat and friction they’ll encounter. Cheap belts might save you a few dollars upfront, but they often wear out faster and can result in a repeat job sooner than you’d like.
Does the thought of selecting the right tools seem daunting? Here’s a simple breakdown:
Belt Removal:
- A serpentine belt tool is specifically designed to release the tensioner, allowing for easier removal of the belt. This tool can be a lifesaver in tight engine spaces.
- Socket wrenches and a set of sockets that fit your vehicle’s tensioner bolt are essential if a serpentine belt tool isn’t available.
Belt Installation:
- Work gloves provide a better grip and protect your knuckles from accidental scrapes.
- Safety glasses are essential as you’ll be working under the hood where rust and grime can easily fall into your eyes.
Last but not least, ensure good lighting. Poor visibility can lead to mistakes, and it’s easier to navigate the engine bay with a clear view.
Armed with this information, you’ll be well-prepared to take on the replacement of your vehicle’s accessory belts. The right tools and materials not only aid in a successful replacement but also contribute to maintaining the longevity and performance of your vehicle.
Steps to Replace Your Accessory Belts
When you’re ready to tackle replacing your accessory belts, making sure to follow each step carefully is key to a successful job. I’ve outlined the process so that even first-timers can feel confident in their ability to restore their vehicle to top-notch performance.
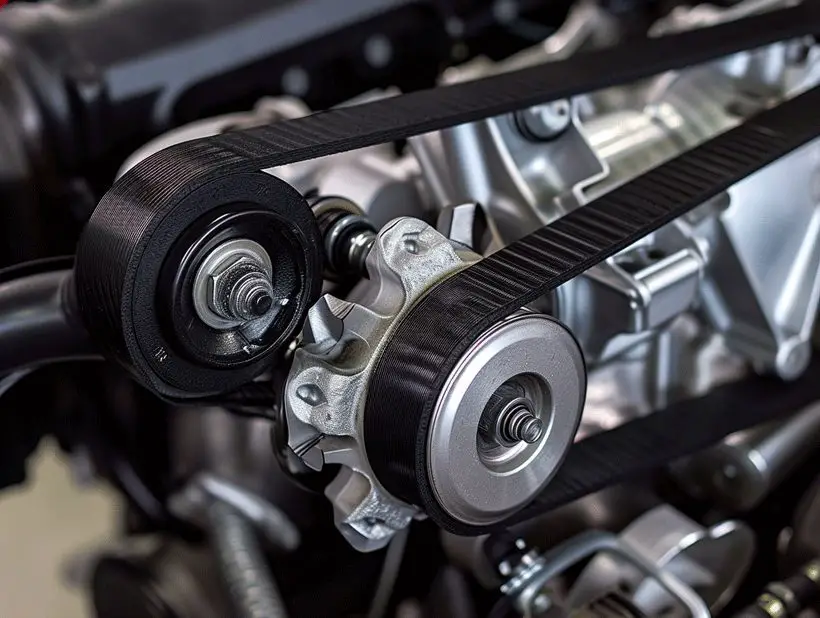
First, locate the serpentine belt tensioner. This component is crucial as it keeps the belt tight against the pulleys of various engine accessories. Using the correct size socket and a breaker bar, turn the tensioner to relieve tension on the belt and slide it off the pulleys.
- Ensure your engine is off and cooled down before attempting to locate the tensioner.
- Use the belt routing diagram for guidance if you need it.
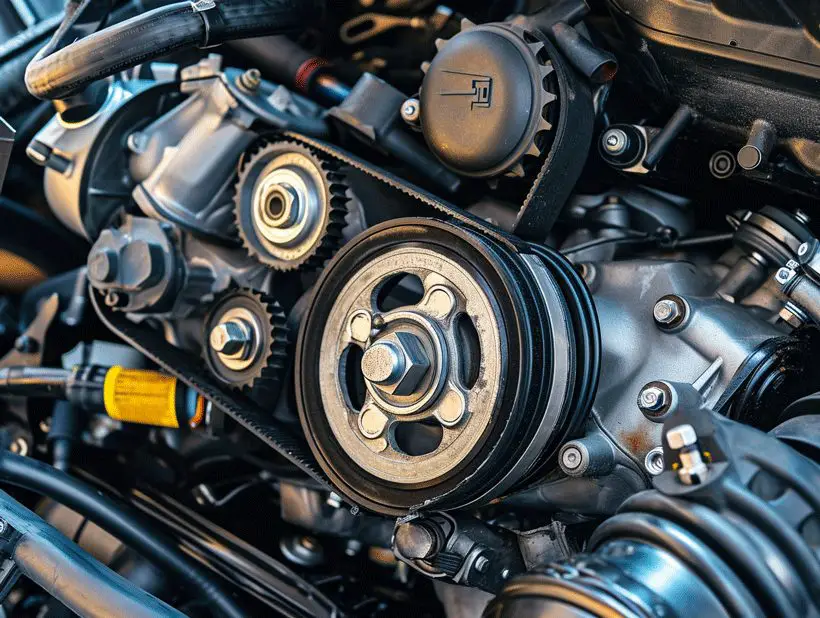
Once the belt is free, inspect all pulleys for signs of wear or damage. Rotate each pulley and listen for noises that might suggest a need for replacement. It’s a good practice to address pulley issues before installing a new belt.
- Look for smooth rotation without grinding or resistance.
- Pay attention to the pulley surface; it should be clean and undamaged.
For the installation of the new belt, align it according to the routing diagram. This part can be a bit like a jigsaw puzzle, but with patience, you’ll have it in place. Start by wrapping the belt around the main pulley and weave it through the remaining pulleys as per the diagram, leaving the tensioner for last.
- Don’t force the belt onto pulleys; it should fit snugly without excessive pressure.
With the new belt laid out around the pulleys, apply pressure to the tensioner and slide the belt into its final position. Double-check to make sure the belt is seated correctly in all the pulleys and the tensioner is tight.
Lastly, give it a test run. Turn your engine on and observe the belt in action. Listen for unusual sounds and observe for smooth operation around all pulleys. If everything sounds and looks good, you’ve successfully completed the replacement.
Tips for a Smoother Belt Replacement Process
When tackling belt replacement, I’m always on the lookout for ways to make the process as efficient and trouble-free as possible. From my years of experience, I’ve picked up several tips that can help you navigate this task with greater ease.
Organize Your Tools Before you start, it’s crucial to get all the tools you’ll need together. Make sure you have:
- A set of wrenches
- A serpentine belt tool or a long-handle ratchet
- A flashlight
- Gloves to protect your hands
Having these at hand before you begin saves you time and avoids the frustration of stopping mid-task to find a tool.
Check Belt Routing Diagrams A common mistake is to just yank out the old belt without noting its routing. Cars usually have a belt diagram under the hood or in the owner‚Äôs manual. If yours doesn’t, take a quick picture with your phone for reference. Trust me, it’s a simple step that saves a lot of guesswork later on.
Keep the Work Area Clear A cluttered environment can lead to lost tools or, worse, accidents. I always clear out unnecessary items from my workspace and make sure I have a clean, flat surface where I can lay out parts and tools.
Inspect All Components While you’ve got everything opened up, it’s a good idea to check over all the accessible components. Here’s what you should look for:
- Signs of wear or fraying on the belts
- Cracks or damage on the pulleys
- Smooth pulley rotation without resistance or noise
Addressing any issues now avoids future headaches.
Gently Route the New Belt When installing a new belt, never force it over the pulleys. Belts are sturdy, but they can be damaged by rough treatment. By gently routing the belt according to the diagram and manually turning the tensioner, you avoid any potential damage to both the belt and the pulleys.
Remember to start the vehicle and listen for any unusual sounds after the replacement. Unexpected noise could indicate incorrect installation or tension on the belt. Overall, staying patient and methodical throughout the process is key to achieving a successful belt replacement.
Common Belt Noise Issues and Troubleshooting
When it comes to maintaining your car, understanding the signs of belt wear and accurately troubleshooting noise issues is essential. Here are a couple of common noises that accessory belts may produce, along with tips on how to address them.
Squealing Noise: This is often the most noticeable belt-related noise. It’s typically caused by a belt that’s either loose or worn out. If you hear a high-pitched squeal soon after starting your engine or during acceleration, it’s time to check:
- Belt Tension: A belt that’s too loose can slip on the pulleys, causing a squealing noise. Most cars have an automatic belt tensioner, but it can fail and may need replacing.
- Pulley Alignment: Misaligned pulleys can also lead to squealing by causing the belt to rub against pulley edges.
- Wear and Tear: Check for any signs of glazing or fraying on the belt surface, which can decrease its grip and make it slip.
Chirping Sound: A rhythmic, chirping noise can indicate a misalignment or a tension issue. It’s essential to inspect:
- Pulley Condition: A worn pulley bearing could be the culprit behind this unpleasant sound. Replacing the bearing or the whole pulley may be necessary.
- Proper Installation: Revisit the installation process to ensure everything was done correctly and that the belt is seated well on all the pulleys.
Grinding or Growling: This noise might not originate from the belt itself but from accessories that it drives. Check these components:
- Alternator Load: Excessive load from the alternator can manifest as a grinding noise. Testing the electrical system might be in order.
- AC Compressor: A struggling AC compressor can make a growling noise, suggesting it may need repair or replacement.
Table 1: Diagnostic Tips for Belt Noise Issues
| Noise Type | Possible Cause | Solution |
|---|---|---|
| Squealing | Loose or worn belt | Check tension, replace belt |
| Chirping | Misalignment or tension | Inspect pulleys, adjust tension |
| Grinding | Alternator load | Test electrical system |
| Growling | Faulty AC compressor | Check and possibly replace unit |