
If you’ve ever popped the hood of your car, you’ve probably spotted the serpentine belt winding its way around various pulleys. It’s a crucial component that powers everything from your alternator to your power steering pump. But like all car parts, it wears out over time, and I’m here to walk you through replacing it with ease.
What is a Serpentine Belt?
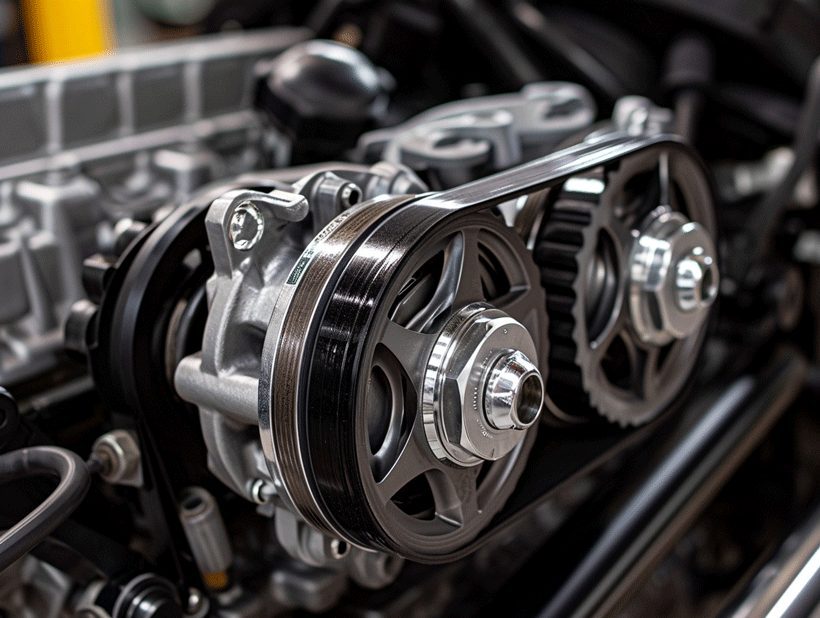
When I pop the hood of my car, one of the first things that catch my eye is the serpentine belt. It’s aptly named for its ability to snake around various pulleys inside the engine compartment. Essentially, it’s a single, continuous belt that drives multiple peripheral devices in an engine, such as:
- Air conditioning compressor
- Power steering pump
- Water pump
- Alternator
- Smog pump
Made from reinforced rubber compound, the serpentine belt is designed to withstand a considerable amount of stress and strain from the engine’s operation. Over time, these belts can develop cracks, become frayed, or lose chunks of rubber, leading to inefficient performance of the components they drive or even complete failure.

To help understand the belt’s lifespan, here’s a quick reference:
| Belt Condition | Potential Action |
|---|---|
| Visible Cracks | Monitor or Replace |
| Frayed Edges | Replace |
| Missing Chunks of Rubber | Replace Immediately |
| Squealing Noise | Investigate/Replace |
Unlike the older multi-belt systems, the serpentine belt’s design allows for a more compact engine layout and typically requires less maintenance. However, due to its critical role, ensuring that it’s in good working condition is non-negotiable for the well-being of my vehicle.
To check the belt, I look for signs of wear, listen for unusual noises, and keep an eye on the engine performance. If there’s any hint of trouble, I prepare to replace the belt by gathering the necessary tools and parts. It’s a manageable DIY project as long as I have a clear understanding of the steps involved, which ensures that I’m never left stranded due to a preventable issue.
Signs of a Worn-out Serpentine Belt

When I’m out in the garage checking under the hood, I always make sure to inspect the serpentine belt thoroughly. It’s crucial to catch the early signs of wear before they escalate into larger issues. I’ve learned to look out for several key indicators that signal it’s time to consider a replacement.
- Visual Inspection: As I examine the belt, I’m on the lookout for cracks, fraying, or missing chunks of rubber. Any of these can suggest the belt has reached the end of its lifespan.
- Squealing Noise: When I hear a high-pitched squeal coming from the engine, it often means the belt is slipping—usually a sign of wear or improper tension.
- Power Loss: If steering becomes tough or if I notice the vehicle’s air conditioning isn’t as effective, it could be due to the belt failing to provide adequate drive to the associated components.
Moreover, I pay attention to the belt’s tension by giving it a gentle push. It should have some give but not too much; around a half-inch of play is generally acceptable. More than that, and I’ll suspect it’s time to reach for my toolbox.
In my experience, a worn belt doesn’t always break down during convenient times. That’s why I keep an eye on the odometer as well. The typical lifespan of a serpentine belt can be anywhere from 50,000 to 100,000 miles. Here’s a quick overview of its expected service life:
| Mileage Interval | Action Recommended |
|---|---|
| 0-50,000 | Monitor for signs of wear |
| 50,000-70,000 | Begin planning for replacement |
| 70,000-100,000 | Replace as preventive measure |
By following this schedule, I’ve managed to keep my car’s auxiliary systems running smoothly without unexpected hitches. It’s a simple yet effective approach to ensure that everything under the hood is in top shape.
Necessary Tools and Materials
When tackling the task of replacing a serpentine belt, it’s crucial to have all the necessary tools and materials on hand before starting the job. It’s frustrating to pause midway through because you‚Äôre missing something crucial. Here’s a comprehensive list I’ve compiled to ensure you’re fully prepared.
- Socket set: Most belts are attached with bolts that’ll require different socket sizes.
- Torque wrench: Essential for tightening bolts to the manufacturer’s specifications.
- Serpentine belt tool or long breaker bar: These tools will help release the tension on the belt tensioner.
- New serpentine belt: Ensure that you’ve got the correct size and type for your car model.
- Floor jack and jack stands (if required): Some vehicles might require you lift it for better access.
- Work gloves and safety glasses: Safety always comes first.
In addition to these items, it’s a good idea to have a flashlight or work light handy, especially if you’re working in a dimly lit area. Not only does proper lighting make it easier to see what you’re doing, but it also helps you avoid any potential injury.
In my experience, a good tip is to keep your smartphone or camera close by. Taking pictures of the setup before you start can be a lifesaver when it comes to remembering the route of the belt. And while not a physical tool, your car’s service manual, or a reliable online guide, will be invaluable as they often contain belt diagrams specific to your model.
Remember, a well-maintained workspace can make the job smoother, so clear the area of any unnecessary clutter. With these items at the ready, you’ll be well on your way to a successful serpentine belt replacement.
Step 1: Locate the Serpentine Belt
After making sure I’ve gathered all the necessary tools and referenced my car’s belt diagram, the first task is locating the serpentine belt. Typically, it’s mounted at the front of the engine and is easy to spot once the hood is open. Here are the steps I follow to ensure I’m working on the right component:
- I check for a belt routing diagram under the hood or on the strut tower, which can be really handy. If there isn’t one, I refer back to the service manual or my previously taken photos.
- I identify the serpentine belt by looking for a long, snake-like rubber belt looping around various pulleys.
- I make a mental note of how the belt weaves through the pulleys. This will help me when threading the new belt.
Understanding the path of the serpentine belt is crucial. This serpent of the engine bay powers vital components like the alternator, power steering pump, water pump, and air conditioning compressor. Mistakes in routing can lead to poor performance or severe engine damage.
I always take a moment to observe the tensioner pulley as well. It’s a key player in the removal process. A tensioner pulley typically looks different from the rest, often with a metal arm and a roller. By applying pressure to it, I’ll release the tension on the belt, allowing for removal.
Once I’ve confidently located the serpentine belt and familiarized myself with the tensioner pulley, I’m ready to move to the next step. It’s all about precision and attention to detail, ensuring everything goes smoothly.
Step 2: Release Tension on the Belt
Once I’ve located the serpentine belt and have a clear understanding of its path, the next critical step is releasing the tension. This will allow me to remove the old belt with ease. To do this, I’ll focus on the tensioner pulley ‚Äì a component specifically designed to keep the belt tight during operation.
Here’s how I do it:
- Identify the tensioner: It’s usually a spring-loaded arm with a pulley attached at one end. The tension-release mechanism can vary from a bolt head, a square slot for a ratchet, or a special tool fitting.
- Choose the right tool: Depending on the tensioner type, I’ll need either a socket wrench, a breaker bar, or a specific serpentine belt tool. Keeping the right tool on hand is essential to avoid damage to other components.
Releasing the Tension:
- Insert the tool: Carefully connect the tool to the tensioner. Make sure it’s properly seated to prevent slipping.
- Apply pressure: With the tool in place, I’ll apply steady pressure in the direction that relieves tension. For most vehicles, this usually mean pushing or pulling towards the car’s front.
- Secure the tensioner: If possible, I’ll lock the tensioner in the released position if a holding feature exists. This isn’t an option on all models, so maintaining pressure can sometimes be the only way.
Once the tension is released, I gently slide the belt off the nearest pulley. I’m cautious during this step because if the tensioner suddenly snaps back, it could cause injury or damage. Maintaining control of the tensioner is key.
With the belt free from the grip of the pulleys, I check for any signs of wear on the tensioner itself. It’s important to replace a malfunctioning tensioner to prevent future serpentine belt issues. Regular maintenance and attentive repairs like these keep vehicles running smoothly for longer periods, ensuring both functionality and safety are up to par.
Step 3: Remove the Old Serpentine Belt
After releasing the tensioner, it’s time to slide the old serpentine belt off the pulleys. I’ll guide you through the process of removing it, which is generally straightforward, but requires patience and attention to detail.
First, you should sketch or take a photo of the belt’s path. Although most vehicles have a routing diagram under the hood, having your own reference ensures that you can retrace your steps if the label is unreadable or missing.

Here’s how to proceed:
- Inspect the Belt’s Path: Verify the belt is fully disengaged from the tensioner and check for any obstructions.
- Gently Remove the Belt: Start by sliding the belt off the pulleys that are most accessible, usually on the front or top of the engine.
- Rotate Pulleys as Needed: Some pulleys may require slight rotation to free the belt. Ensure you keep your fingers clear of pinch points during this step.
As you remove the belt, inspect it for signs of wear such as cracks, fraying, or glazing. These symptoms indicate it was time for a replacement. Also, take this opportunity to inspect the pulleys for damage or deposits of belt material, which can signify alignment issues or a failing component.
Next, you’ll darken the belt path if it’s on a diagram in your vehicle, or annotate your sketch, showing the direction the belt was routed. This will be vital when threading the new belt.
If you encounter stiff pulleys or accessories that won’t release the belt, don’t force them. Instead, check if you missed a securing component or if additional tension is applied elsewhere. Occasionally, accessory components linked to the serpentine belt system, like the alternator, have bolts that may also need to be loosened to free the belt.
Removing an old serpentine belt isn’t just about yanking it out‚Äîhandling it with care avoids damage to other engine components and sets the stage for smooth installation of the new belt. Keep your workspace clear and your tools organized; you’ll need them again shortly for the next steps.
Step 4: Install the New Serpentine Belt

After carefully removing the old belt, it’s time to place the new serpentine belt onto the pulleys. It‚Äôs essential to ensure that the belt is configured correctly to avoid any potential damage to the vehicle. Here‚Äôs how I typically approach this crucial step:
- Reference the Diagram: I always start by referring to the belt routing diagram I’ve previously darkened or the sketch I’ve annotated. This visual aid is key to installing the serpentine belt accurately.
- Align Pulleys: I ensure each pulley is aligned perfectly as even a slight misalignment can cause the belt to wear prematurely or even snap.
- Thread the Belt: Starting with the crankshaft – which is usually the largest pulley – I begin to thread the new belt around each pulley. I follow the path outlined in the diagram, making sure the belt sits squarely in the ribs of the pulleys.
- Tensioner Pulley: The tensioner pulley is critical in this process. With a wrench suitable for your car’s tensioner, I apply pressure to create slack, allowing the belt to fit around the remaining pulleys.
- Double-Check the Path: Before releasing the tensioner, I double-check that the belt is properly seated on all pulleys and is following the correct path.
- Release the Tensioner: After confirming everything is set, I gently release the tensioner, allowing it to tighten the serpentine belt to its appropriate tension.
I often rotate the pulleys a full turn by hand to ensure the belt has seated correctly. If I notice any misalignment or slack, I‚Äôll readjust as needed. Regularly checking the tensioner’s pressure is also crucial; it should be firm but not overly tight, as this could cause undue strain on the bearings and pulleys.
Lastly, I keep an eye out for any unusual noises when the engine is started. Squealing or chirping sounds can indicate an improperly installed belt or other issues that may have been overlooked. If all seems well, I take a moment to review the work to confirm that the new serpentine belt is in place, tensioned correctly, and ready to perform as expected.
Step 5: Check the Belt Alignment

After installing the new serpentine belt, it’s critical to ensure it’s properly aligned. Misalignment can lead to rapid wear and tear or even belt failure, which you definitely don’t want to deal with after this maintenance task.
Proper belt alignment involves the following checks:
- Visual Inspection: First, I make sure the belt sits squarely on all pulleys. If it’s even slightly off-track, it can ride over the edge and suffer damage.
- Pulley Grooves: Each rib of the belt should fit neatly into the grooves of the pulleys. No part of the ribs should be protruding or tucked in between.
To offer you an idea of what to look for, here’s a simple alignment check table:
| Belt Position | Proper Alignment | Signs of Misalignment |
|---|---|---|
| On Pulleys | Centered on all the pulleys | Edges overhanging the pulleys |
| In Pulley Grooves | Flush with the pulley surface | Ribs not seating in grooves |
If the belt isn’t correctly aligned, I carefully reposition it, ensuring that each section of the belt is where it needs to be. Sometimes it takes a bit of maneuvering to get it perfect, especially in tight engine bays where visibility is limited.
It’s also a good time to check the tension once again. A properly tensioned belt should have a slight give when pressing on it, but it shouldn’t be too loose or excessively tight. Modern systems often have an automatic belt tensioner, but I always give it a look to confirm it’s working as intended.
In the process of checking alignment and tension, I never forget to inspect for any foreign objects or debris that could have found their way into the belt path. Clearing these out immediately helps to avoid potential damage.
By taking the time to thoroughly assess the serpentine belt installation, I help to ensure a smooth operation and extend the lifespan of the belt. And remember, regular maintenance checks after installation are key to catching any issues early.
Step 6: Restore Belt Tension
Once I’ve confirmed the serpentine belt is properly aligned, it’s crucial to restore the tension to keep it snug against the pulleys. If the tension is too loose, the belt might slip; too tight, and I could put excessive stress on the bearings, leading to premature failure. Here’s my approach to adjusting the belt tension:
- For automatic tensioners:
- I rotate the tensioner arm to relieve pressure and carefully remove my tool.
- Then, I slowly release the tensioner to allow it to apply the correct pressure on the belt.
For manual tensioners, I follow these steps:
- I loosen the tensioner bolt slightly with a wrench.
- I adjust the tensioner’s position to achieve the proper tension on the belt.
- Using a tension gauge, I check that the tension falls within the manufacturer’s recommended range. If I don’t have a gauge, a good rule of thumb is being able to twist the belt slightly at its longest point.
- Once correct tension is achieved, I retighten the tensioner bolt to secure it in place.
After adjusting the tension, it’s good practice to give the belt a few turns by hand to ensure the tension is consistent throughout its rotation. It’s vital to ensure the belt has no more than a half-inch of give. I always double-check my work to prevent any costly mishaps.
Next, I start the engine and let it idle to observe the belt in motion. What I’m looking for here is smooth operation without any wobbles or squeaks. If I hear a noise or see improper movement, it’s back to the adjustment phase. Regular monitoring of the serpentine belt, especially after new installation, aids in early detection of any potential issues, allowing me to address them before they result in a breakdown.
Ensuring that the serpentine belt maintains the correct tension is an integral part of the replacement process. It’s just one of the several essential car maintenance tasks that I prioritize to stay ahead of vehicle wear and tear.
Step 7: Test the New Serpentine Belt
Once I’ve made sure the serpentine belt is properly installed and the tension is correctly adjusted, it’s time to test the new belt. Testing is a crucial step in the replacement process because it’ll confirm whether the belt is functioning as it should. Here’s how I go about it:
- I start the engine and let it run for a few minutes, monitoring the belt’s movement. It’s essential to look for smooth travel around the pulleys and make sure there’s no vibration or wobbling indicating misalignment.
- I listen for any unusual noises. A well-installed belt should not make any squealing or chirping sounds. If there are any suspicions, I immediately shut off the engine to inspect and rectify the issue.
- Checking all the accessories driven by the belt, such as the alternator and power steering, is next on my list. Proper operation means the belt’s doing its job.
- It’s also helpful to take a short test drive if possible. During the drive, I pay attention to the vehicle’s performance, ensuring that all systems powered by the belt are working without a hitch.
I remind myself to keep an eye on the belt’s condition during the first few weeks after installation. It’s not uncommon for a new belt to require a slight readjustment after it’s had a chance to “settle in.” The rule of thumb here is being proactive; catching any small issue early on prevents bigger problems down the line.
Maintaining a serpentine belt demands regular observation. A quick glance every now and then could be the difference between a minor tweak and a costly repair. I make a mental note to periodically inspect the belt for wear and tear even after the test period, as part of ongoing vehicle maintenance. Remember, vigilance with your serpentine belt not only extends its life but also safeguards the integrity of the vehicle’s entire mechanical orchestra.
Conclusion
Replacing your serpentine belt is a task that can save you time and money when done correctly. Remember, after installing the new belt, it’s crucial to ensure everything is running smoothly. Keep an ear out for any odd sounds and an eye on the belt’s tracking. With your new belt properly tested and your commitment to regular checks, you’ll keep your vehicle in top shape. Trust in the steps you’ve taken and drive with confidence, knowing you’ve tackled an important piece of car maintenance like a pro.