Experiencing a stuck brake caliper can be more than just a nuisance; it’s a safety hazard that demands immediate attention. I’ve been there, feeling that unwelcome drag when I’m trying to accelerate or noticing my car pulling to one side. It’s frustrating, but luckily, it’s a fixable issue.
In my years of dealing with car troubles, I’ve learned that understanding the root cause is key to a successful repair. That’s why I’m going to walk you through some troubleshooting tips for brake caliper issues. Whether you’re an avid DIYer or just looking to be more informed before heading to the mechanic, I’ve got you covered.
Let’s dive into the world of brake calipers and get to the bottom of that pesky sticking problem. With the right approach and a bit of patience, you’ll be back to smooth driving in no time. Stay tuned as I break down the steps to diagnose and fix a stuck brake caliper.
Understanding Brake Calipers and their Function
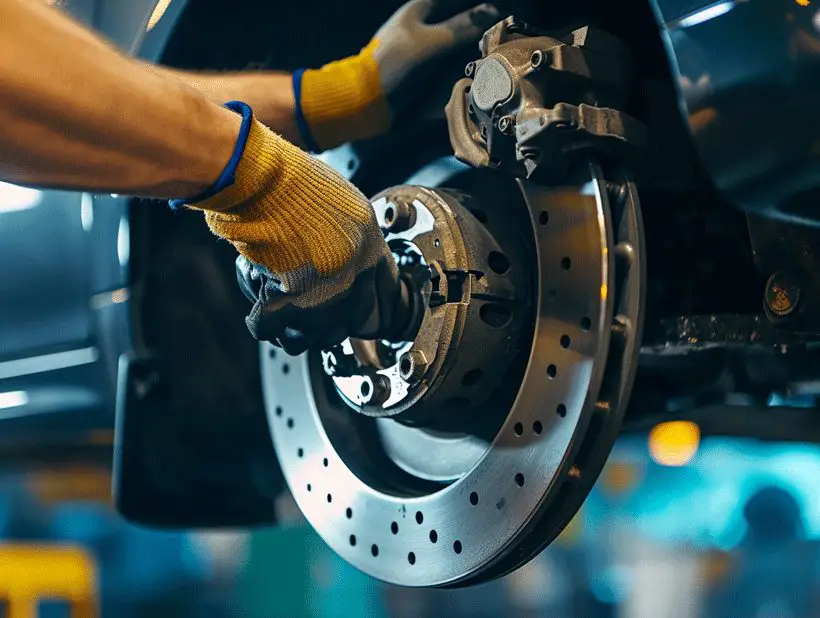
As a seasoned car owner and an experienced DIYer, I’ve learned that the brake caliper is a vital component of a vehicle’s braking system. Here I’ll break down its function and importance so that you, too, can grasp why a stuck caliper demands immediate attention.
Essentially, brake calipers are the muscle behind your car’s stopping power. Acting as a clamping device, the caliper exerts pressure on the brake pads, compelling them against the rotors to decelerate or halt your vehicle. This is achieved through a hydraulic system that translates the force from your foot on the brake pedal into a clamping force that slows the wheel.
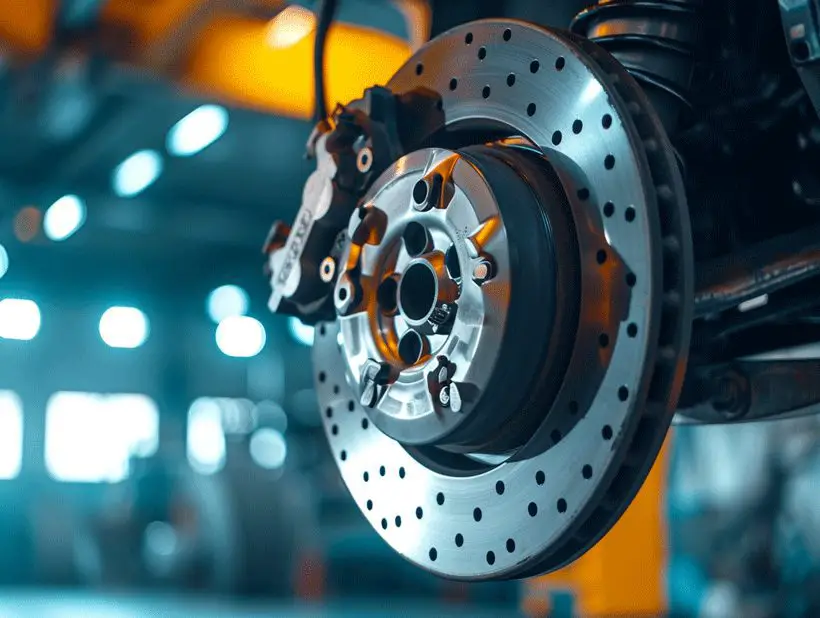
Within the caliper, you’ll find pistons whose job is to move the brake pads. These pistons extend when you apply the brakes, pushing the pads towards the rotor. Proper lubrication and clean brake fluid are crucial in ensuring that this process is smooth and effective. Meanwhile, the caliper itself must be free to slide on its guides or pins, allowing for an even application of pressure.
Maintenance is key in avoiding problems such as a stuck caliper. Regular checks and replacing brake fluid can ward off the common culprits: corrosion and debris build-up. If the caliper becomes seized, often due to these issues, it can lead to uneven braking, increased stopping distances, and even total brake failure.
It’s worth noting too that brake calipers come in different types: fixed and floating. Fixed calipers, which are typically found in high-performance cars, do not move but have multiple pistons on both sides of the rotor. Floating or sliding calipers, common in standard vehicles, move in and out relative to the rotor and usually have one or two pistons on the inboard side only.
By understanding these components and their functions, you‚Äôre better prepared to troubleshoot issues and perform necessary repairs. Regular maintenance not only extends the life of brake calipers but ensures your safety on the road. Remember, a caliper that’s not functioning properly can compromise your entire braking system, so it’s an aspect of car maintenance that should never be overlooked.
Signs of a Stuck Brake Caliper

When I’m driving, I stay alert for any signs that might indicate a problem with my vehicle, especially if it involves the brake system. Recognizing the signs of a stuck brake caliper can mean the difference between a safe journey and a potential roadside emergency.
One indicator that’s hard to miss is when my car pulls to one side when I apply the brakes. Uneven brake pad wear can be the culprit here, often caused by a caliper that isn’t releasing properly. If I notice that one side seems to be wearing down faster than the other, it’s a clear sign that there’s an issue worth investigating.
Another symptom I keep an ear out for is unusual noises coming from the wheels. A squealing or grinding sound when braking generally isn’t a good sign. It suggests that the pads are constantly being pressed against the rotor, indicating a stuck caliper.
I also stay vigilant for a burning smell after coming to a stop. Heat buildup from a seized caliper can manifest as a sharp, chemical odor that’s unmistakable. It’s a serious warning that requires immediate attention.
To confirm my suspicions, I might perform a spot check for excessive heat after a drive. Carefully touching the wheel near the brake components, I check for a noticeable temperature difference between wheels. If one is particularly hot to the touch, it’s likely due to a caliper that’s not retracting as it should.
Here’s a quick checklist of the symptoms:
- Vehicle Pulling to one side during braking
- Uneven Brake Pad Wear on one side of the vehicle
- Unusual Noises like squealing or grinding from the wheels
- A Burning Smell from the wheels after driving
Monitoring these symptoms is crucial for maintaining my car’s brake system, and addressing them early can save me from costlier repairs down the line. If any of these signs appear, I know it’s time to look closer at the brake calipers and potentially take my car in for maintenance or the appropriate repairs.
Diagnosing the Root Cause of the Issue
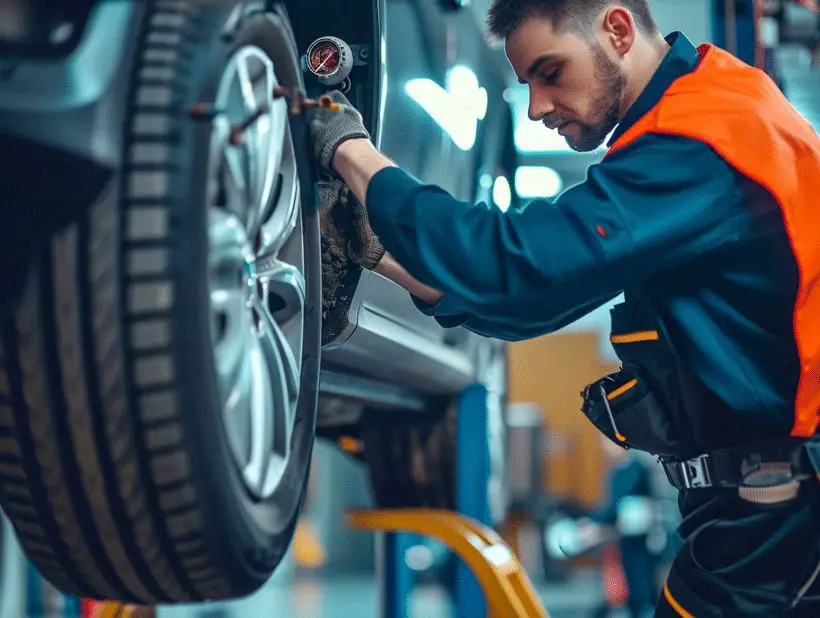
When facing a problem with a stuck brake caliper, it’s essential to accurately diagnose the issue before attempting any repairs. This step is crucial; guessing can lead to unnecessary expenses and more damage. I like to start by safely elevating the vehicle and removing the wheel for a better view of the brake assembly.
Visual Inspection
A thorough visual inspection often reveals tell-tale signs of a malfunctioning caliper. Here are some key points I look for:
- The condition of the brake pads and rotor: uneven wear or damage can indicate caliper problems.
- Signs of fluid leakage: this could mean a failed caliper piston seal.
- The caliper’s sliding pins: they should move freely; if not, they could be causing the caliper to stick.
I check the caliper bracket and the surrounding hardware for corrosion or damage, too, as these can contribute to brake caliper sticking.
Mechanical Testing
Next up, I perform a series of mechanical tests:
- By applying and releasing the brake pedal, I observe if the caliper releases properly. Sticking indicates an issue.
- I also inspect brake hoses for any swelling or cracking that could restrict hydraulic pressure, impacting the caliper’s function.
Hydraulic System Assessment
The hydraulic system plays a pivotal role in caliper operation. I always ensure that the brake fluid is at the right level and that there are no air bubbles in the system, which can affect braking pressure.
Analyzing the Brake Lines and Fluid
Contaminated brake fluid can cause calipers to stick, so I recommend examining its color and consistency. If it’s dark or has particles floating in it, a brake fluid flush and replacement might be necessary.
By methodically checking each potential root cause, I can pinpoint exactly what’s behind the brake caliper issue. From there, deciding on the appropriate fix becomes a straightforward process. With brakes being a critical safety component, I ensure I never rush the diagnosis. Patience and precision here lead directly to safer, smoother driving.
Tools and Materials Needed for the Repair
Before diving into the actual repair of a stuck brake caliper, it’s crucial to have all the necessary tools and materials at hand. This preparation makes the process smoother and prevents any interruptions once the job has begun. I’ve found that being organized not only saves time but also reduces the likelihood of mistakes.
Essential tools that I’ve learned to keep within arm’s reach include:
- A jack and jack stands for safely lifting and supporting the vehicle
- A tire iron or impact wrench for removing the wheel
- A ratchet set with sockets of various sizes
- A breaker bar for those stubborn bolts that seem immovable
- Allen keys or Torx bits, depending on the caliper design
- A high-quality C-clamp or a caliper piston tool to retract the caliper piston
- A set of combination wrenches, mainly to tackle the brake hose bolt
The materials necessary might not be as obvious as the tools, but they’re just as important:
- New brake pads, if the old ones are worn or damaged
- Brake caliper grease to ensure everything slides and moves as it should
- Brake cleaner spray for removing dirt, oil, and other contaminants
- A small bungee cord or a piece of wire to support the caliper during the repair, preventing stress on the brake hose
- Quality replacement parts for any damaged components like caliper pins or boots
- Fresh brake fluid compatible with your vehicle, in case you need to top it off or replace it
Sometimes, you might not realize a material’s importance until you’re in the thick of things. For example, having a few extra rags nearby for quick cleanups or dealing with brake fluid can be a game-changer. I’ve also learned to wear safety gloves and eyewear; brake jobs tend to get messy and it’s best to protect oneself from any potential hazards.
Being prepared with the right tools and materials ensures that once I start fixing that stuck brake caliper, I can do so effectively and without unnecessary pauses. That way, I can focus on doing the job well, using the skills I’ve honed to handle any challenges that arise. This level of preparation reflects the high standards I set for my work and the satisfaction I get from a job done right.
Step-by-Step Guide to Fixing a Stuck Brake Caliper
When tackling a stuck brake caliper, meticulous attention to detail can make all the difference. I’ll walk you through a step-by-step process designed to demystify what might initially seem daunting. Before diving in, make sure you have all your tools and materials handy, as detailed in our previous section.
Secure Your Vehicle
First, I ensure the car is parked on a level surface. Using the parking brake can seem counterintuitive here, as we’re dealing with brakes, but remember, parking brakes typically engage the rear wheels and we’re likely fixing a front caliper. With the wheels chocked and the car lifted using a jack, it’s critical to position the jack stands under the car for stability.
Remove the Wheel
Once the area is secure, I move on to removing the lug nuts and the wheel to expose the brake caliper. This provides clear access to the brake assembly, which is what we’re targeting.
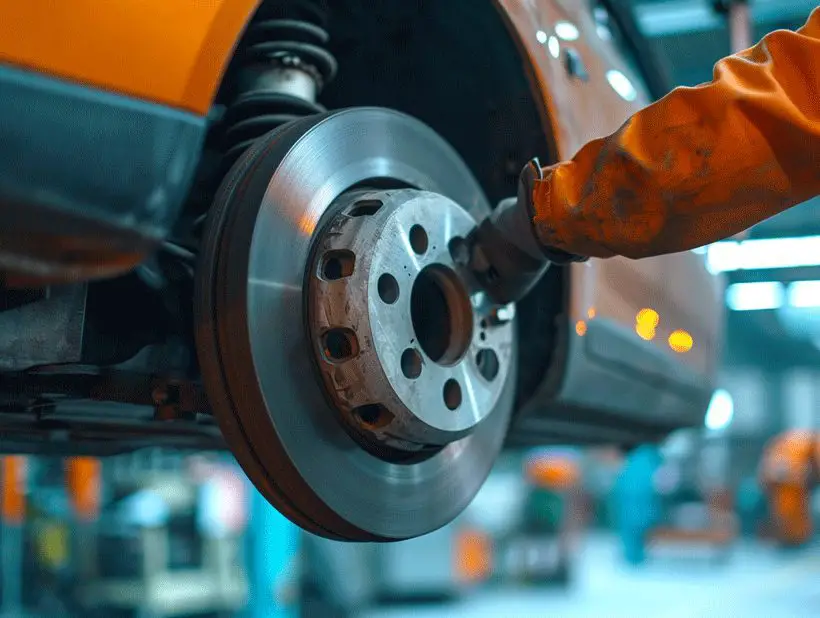
Inspect the Brake Caliper
A visual inspection helps me pinpoint whether the caliper is indeed stuck. Signs of uneven wear on the brake pads or difficulty rotating the wheel by hand often confirm suspicions. At this point, it’s helpful to have a digital camera or smartphone handy to take pictures of the assembly. Documentation can be invaluable if you need to refer back or seek advice.
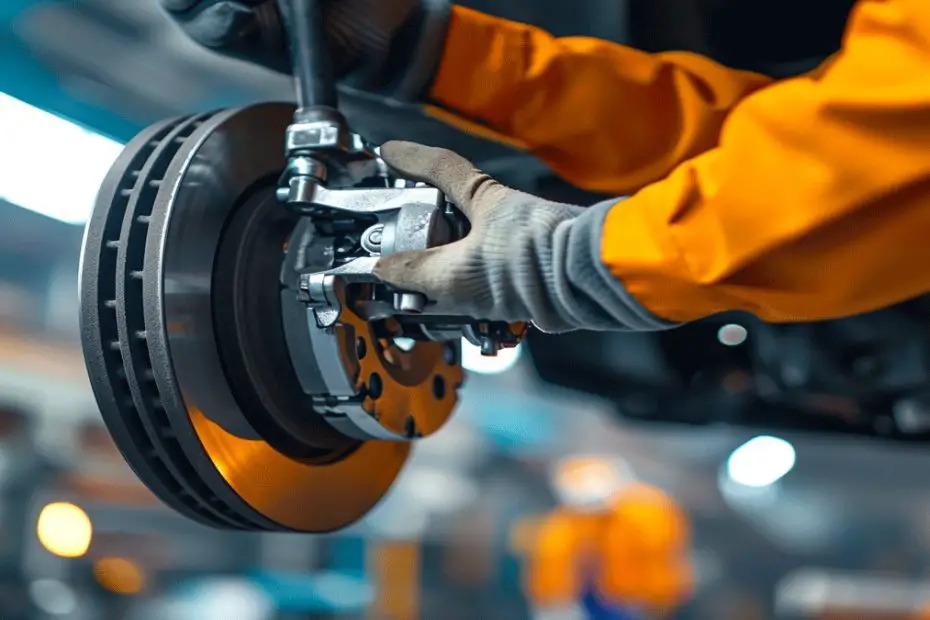
Disassemble the Brake Caliper
Carefully, I proceed to remove the caliper bolts using a ratchet set. It’s crucial to support the caliper to prevent stress on the brake lines. I hang it securely with a wire or a bungee cord without disconnecting the brake line unless completely necessary.
Clean and Lubricate
Once removed, I clean the caliper thoroughly with brake cleaner spray, ensuring no grime or brake dust remains. This is followed by applying brake caliper grease to the sliding pins, which can often alleviate the sticking problem.
Precautions to Take during the Repair Process

When dealing with a stuck brake caliper, it’s crucial to approach the repair process with caution to prevent injury and avoid causing further damage to the vehicle. I’ve outlined several key precautions you should take to ensure a safe and effective repair.
Safety First
Always prioritize your safety. Before you begin, make sure you’re wearing the appropriate protective gear. This should include safety glasses to shield your eyes from brake dust and debris, and gloves to protect your hands from sharp objects and cleaning solvents. Work in a well-ventilated area to avoid inhaling fumes from brake cleaner or other chemicals.
Use Quality Tools
Having the right tools is not just about convenience; it’s about safety, too. Employ quality, well-maintained tools to prevent them from breaking during the repair, which could cause injury. Ensure you have a proper torque wrench for reassembling the brake components to manufacturer specifications.
Stabilize Your Vehicle
Before even touching the brake caliper, ensure that your vehicle is securely lifted and on jack stands rated for its weight. Never rely solely on a jack to hold up your car while you’re working under or around it. Block the wheels that remain on the ground to prevent any possibility of rolling.
Avoid Force and Extreme Heat
If components are stuck or difficult to disassemble, exercise patience. Apply penetrating oil and allow it time to work before trying again. Avoid using excessive force or heat to dislodge parts as these methods can compromise the integrity of the metal, leading to potential brake failure.
Check for Corrosion and Damage
As you disassemble, inspect each part carefully for signs of wear or corrosion. If you identify any damage or parts that appear unduly worn, it’s best to replace them. Reassembling with deteriorated components can result in brake malfunction and endanger your safety on the road.
By following these precautions, I’m confident you’ll navigate the complexities of fixing a stuck brake caliper with greater assurance and display the finesse of an experienced DIY mechanic.
When to Seek Professional Help
Sometimes, despite your best efforts troubleshooting brake caliper issues, you may reach a point where professional assistance is needed. I’ve found this to be particularly true when the problem goes beyond the scope of standard maintenance or if specialized diagnostic tools are required. There are several indicators that it’s time to call in the experts.
Firstly, if you’ve tried the previously outlined steps and your caliper still sticks, it might signal a more severe issue, possibly with the car’s hydraulic system or an internal caliper fault that isn’t easily visible. Another red flag is if you find fluid leaks anywhere in the brake system. These leaks can lead to reduced brake pressure and potential brake failure. I’m always cautious and advise immediately seeking a professional mechanic when this happens.
Complexity in Repairs can also necessitate professional help. Cars with electronic brake systems or advanced features like brake assist might require specific software to properly diagnose and fix issues. This sort of equipment isn’t typically found in a home garage.
I also recommend a professional inspection after any collision, no matter how minor. Impacts can cause subtle damage not easily caught by the untrained eye, and sometimes what looks like a caliper problem might be a symptom of a larger issue. And if you experience inconsistent braking performance after attempting a repair or if the caliper seems to re-stick after being serviced, it’s best to hand the job over to someone with more advanced tools and training.
Lastly, if you’re unsure about any part of the process or uncomfortable with the potential risks, there’s no shame in seeking help. Safety should always be your top priority. Professionals are equipped with the training, experience, and tools to handle the job efficiently and safely. Remember, your confidence and peace of mind when driving are paramount.
Conclusion
Fixing a stuck brake caliper can be a straightforward process if you’re meticulous and equipped with the right tools. Remember that safety is paramount and taking shortcuts could lead to further complications. Should you encounter persistent issues or suspect more serious damage, don’t hesitate to call in a professional. Trusting a skilled mechanic can save you time and ensure your vehicle’s braking system functions optimally. Keep in mind that regular maintenance is key to avoiding brake caliper problems in the future. Stay safe on the roads and never underestimate the importance of well-maintained brakes.